
Introduction
This article describes best practices for capturing and managing rail inspection data. It is designed to ensure our clients maximise the value of their Cordel solution, generating good quality data that can be used for processing and analysis. It includes information on how to check Cordel capture hardware, monitor for issues during capture, transfer data once capture has concluded and avoid some common pitfalls.
Hardware Installation and Maintenance
Installation of Hardware
You should not need to install or change the configuration of your hardware at any stage.
Maintenance of Hardware
Maintaining your Cordel capture hardware is straight forward and does not involve disassembling or uninstalling the unit.
Safety
-
Ensure that the system is powered off, use personal protective equipment (PPE) and follow the safety procedures of the work site.
Visual Inspection
It is recommended you perform a visual inspection of your hardware before each major capture run. Look for physical damage to the unit and its cables, ensure the unit is securely fastened to the brackets and check that the cable connections are secure,
Sensor Cleaning
LiDAR and Video sensors should be cleaned regularly to avoid dirt, fingerprints or oil affecting the quality of captured data.
More about how to clean the LiDAR and Camera sensors on your Wave-Rugged or Wave-OEM is available in the Cordel Knowledge Base and is supplied in the hardware User Guides.
Capture Best Practices
Field Of View
Video: Be Aware Of Your Hardware When Coupling
Carriages that are couple to the end of a capture vehicle may block the view of the Cordel capture unit and render all captured data unusable.
Antenna:
Typically, GNSS antennae require a clear sky view in order to maintain an accurate GPS fix. This is defined as being 15° degrees from the horizontal top face of the Rugged Unit.
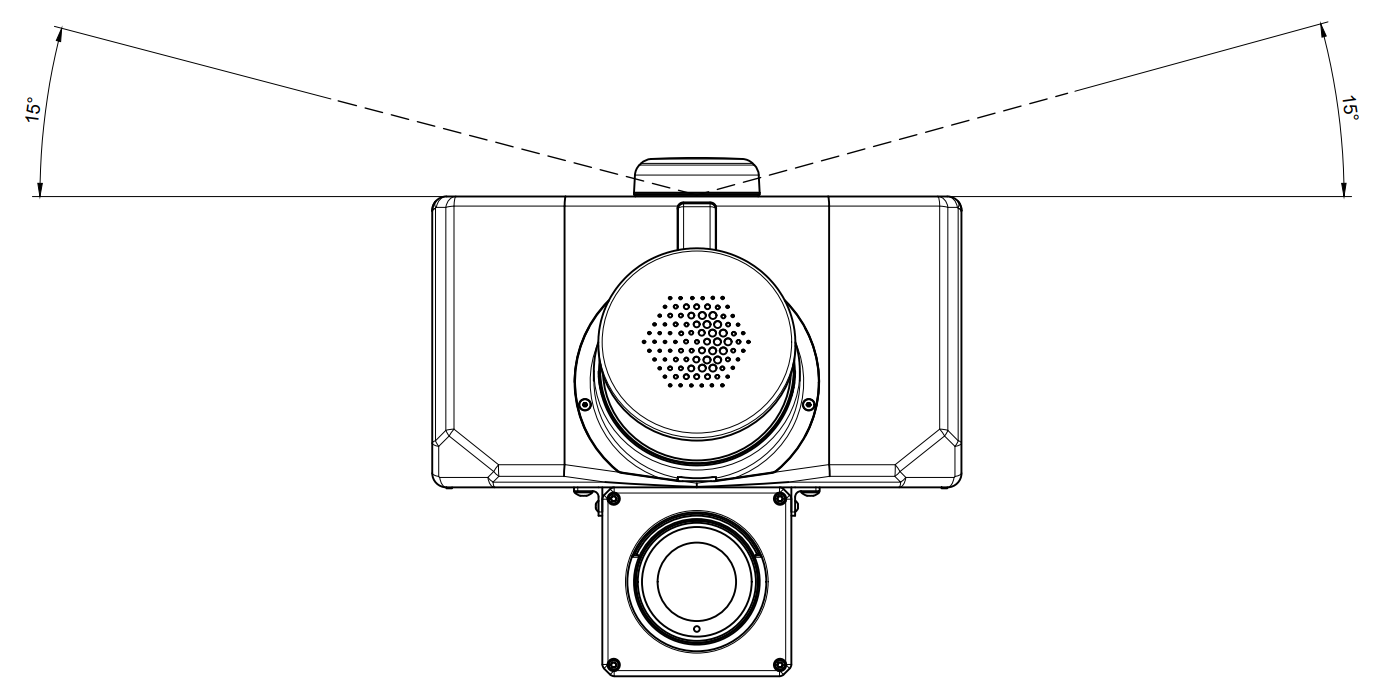
All Cordel hardware is installed with this requirement.
Note: where a clear sky view is not available (e.g. in tunnels or under ground), GNSS data may be unreliable or unavailable.
LiDAR:
To prevent LiDAR occlusion, ensure that there are no obstacles that could interfere with the LiDAR beam. Even partial blockage of the LiDAR can result in inaccurate data capture.
All Cordel hardware is installed with this requirement.
How To Start/End Capture
Automatic Capture Mode: Capture will begin automatically when motion is detected. Capture will end automatically when vehicle stops moving.
Manual Capture Mode: Use the Start/Stop recording functionality in Ground Station.
Note: Data is automatically captured in 15 minute segments, referred to as “missions.”
When one mission is completed and the next begins, the camera icon will turn red while a new video file is created.
Avoid Short Captures
Capture for at least three minutes to avoid short captures. Short captures may generate errors when users attempt to upload them using Cloud Sync, and this data is then unable to be processed.
Long, continuous capture generates high quality data for processing.
Repetitive Capture vs Continuous Capture
In situations where back-and-forth movement is required (for example, if Cordel hardware has been installed on a Geometry capture vehicle), this section of track should be recaptured in a single, continuous pass to optimize LiDAR data collection. This is particularly important in areas with complex track infrastructure components such as switches, turnouts, and other special trackwork, where continuous LiDAR capture is essential.
Monitoring Capture With Ground Station
Ground Station is the software that operates alongside the Cordel hardware and is typically installed on the OnBoard Computer. It requires an internet connection to function properly.
Before you begin capture
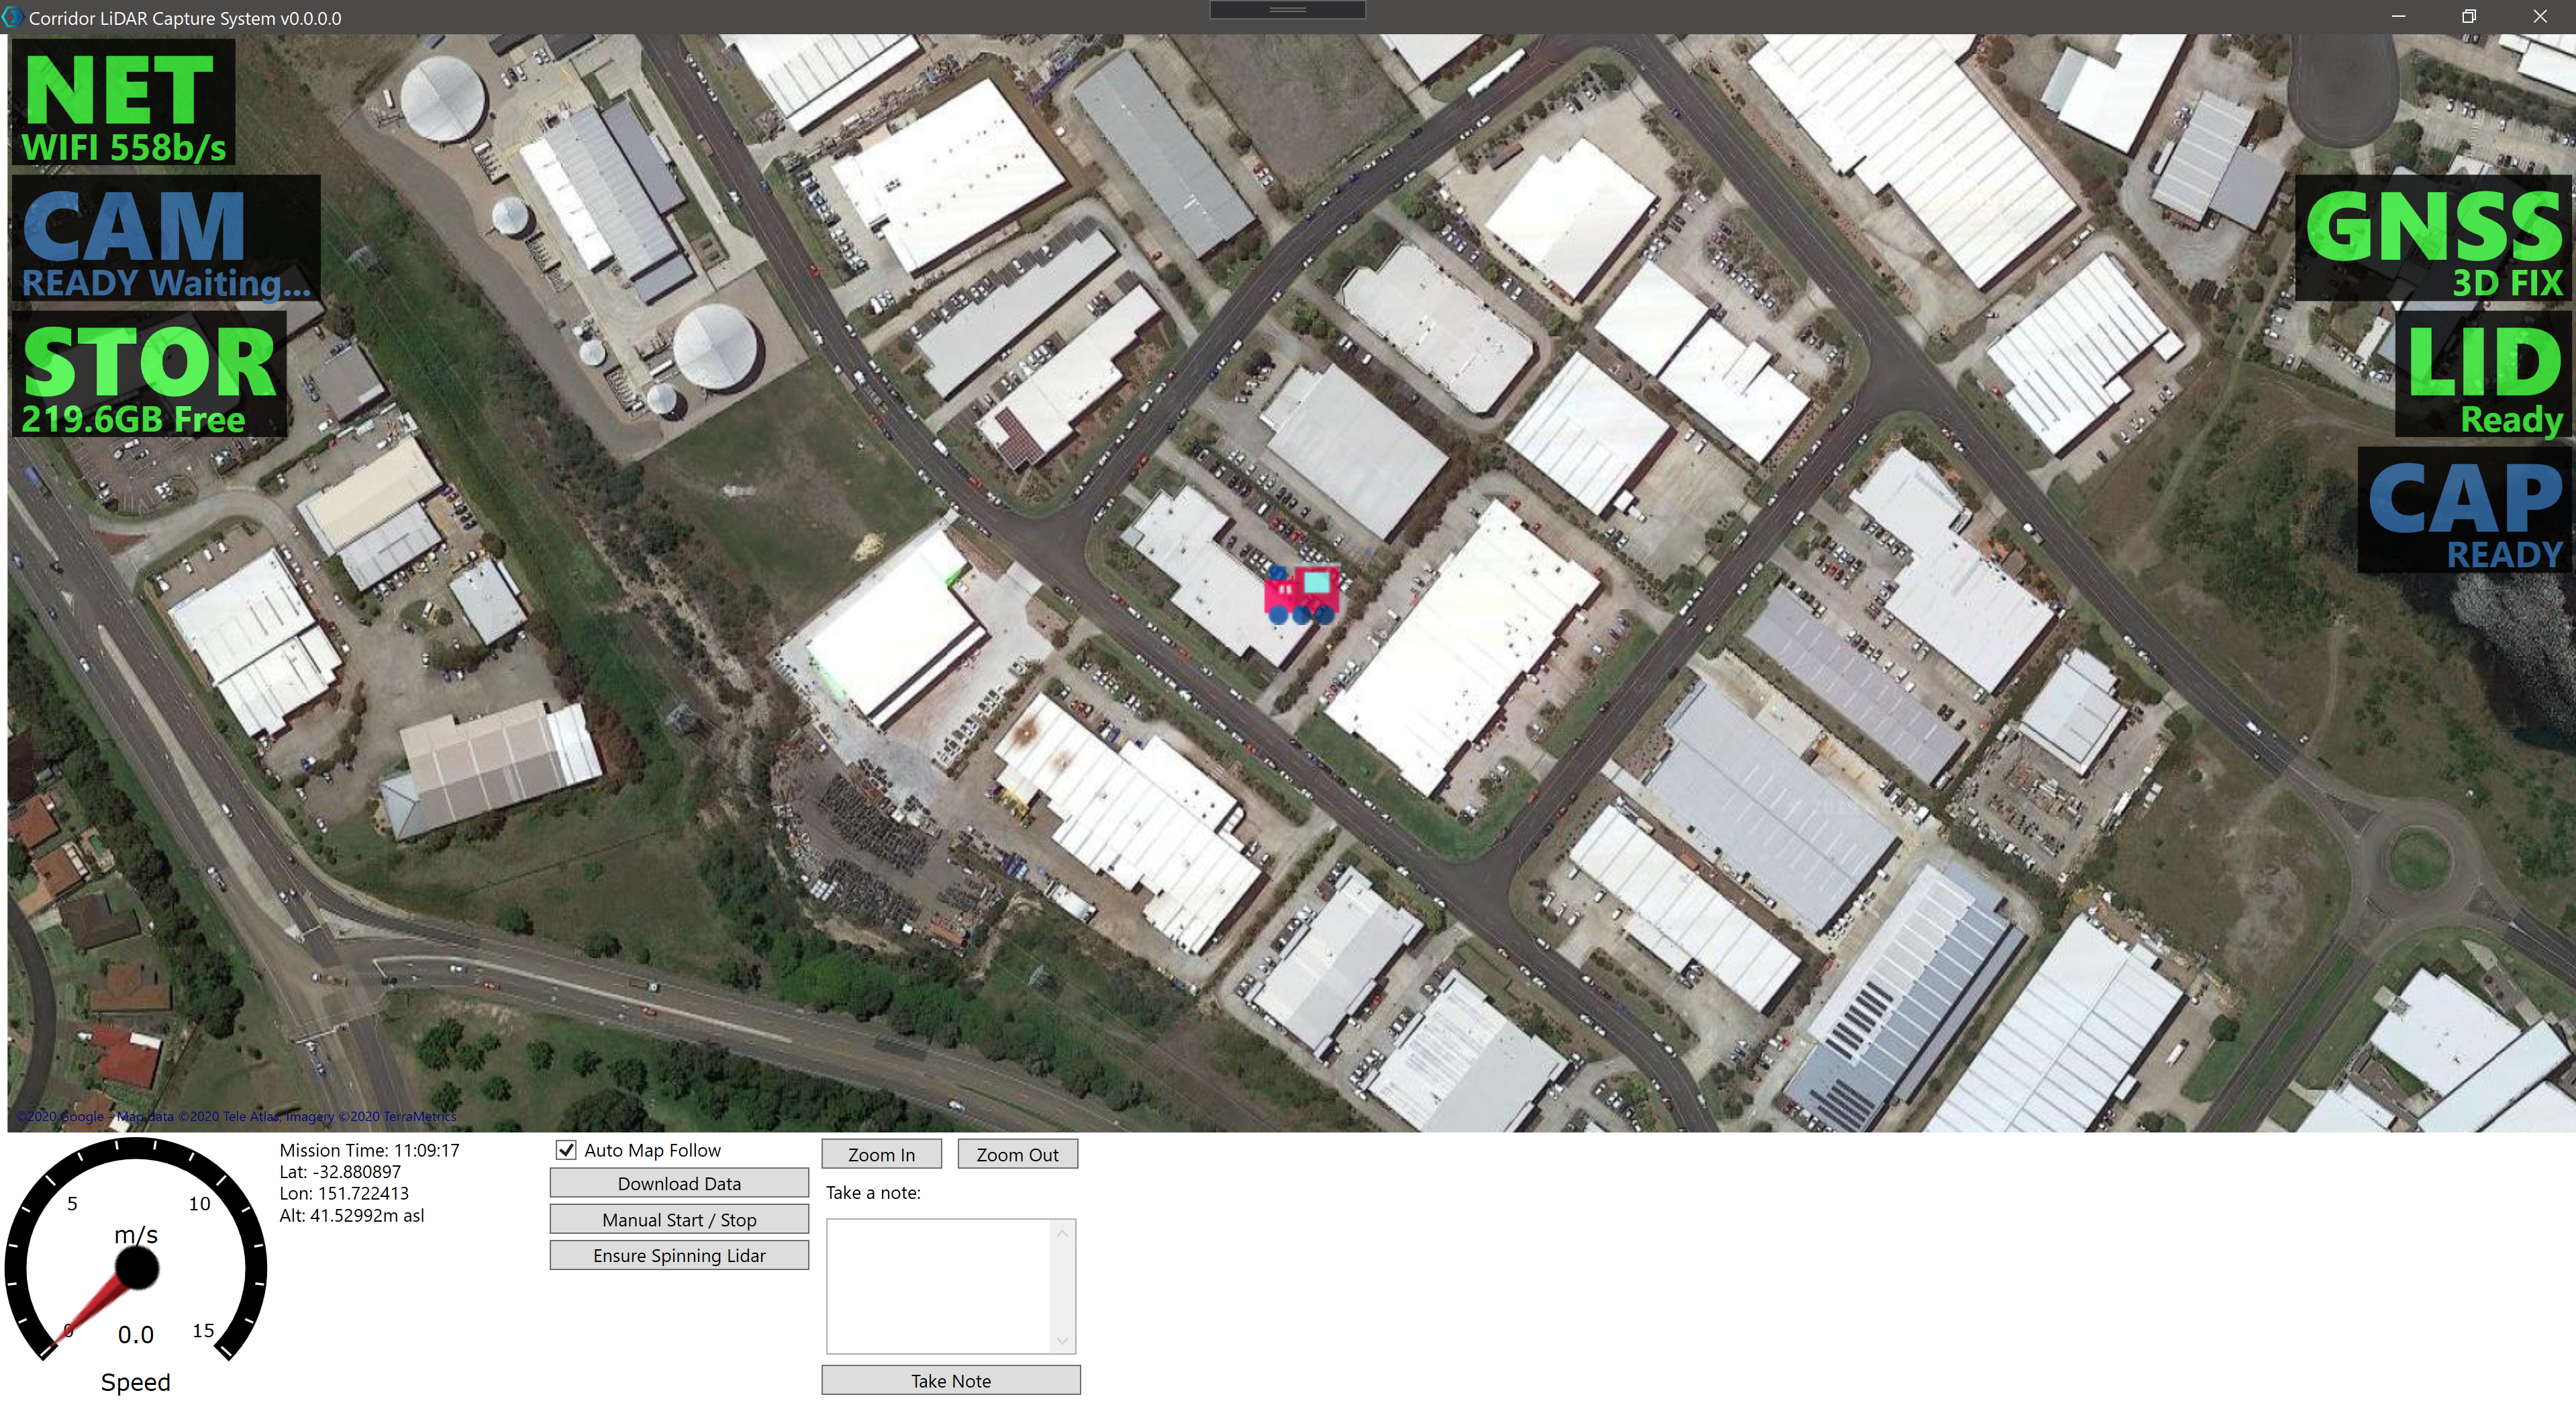
Once the Lidar is ready and the GNSS is reporting it has a position lock (green across the board) the hardware is ready to begin data capture.
During active capture: monitor capture hardware
Use Ground Station to monitor the health of the capture system in real-time, allowing potential capture issues to be identified and resolved in the field.
Ground Station shows health status information for:
|
NET |
Network Connection |
🟩 The hardware unit has a connection to Ground Station
|
|---|---|---|
|
CAM |
Camera Sensor |
🟩 The camera is connected
|
|
STOR |
Storage |
🟩 There is sufficient storage space available on the hardware unit
|
|
GNSS |
Global Positioning |
🟩 The hardware has a good GNSS fix
|
|
LID |
LiDAR Sensor |
🟩 The LiDAR sensor is connected
|
|
CAP |
Capturing |
🟩 The hardware is currently recording capture data
|
The LiDAR and GNSS indicators can take up to 2 minuets to reach the capture state and may show warning icons until then.
What to do if a sensor is red/ not not functioning as expected
-
Check the Hardware unit and Host Machine has power.
-
Check all cables are securely attached to their respective ports.
-
Check any antenna cables for pinches or kinks.
-
Power cycle the Camera.
-
Re-start the Host Machine.
-
Contact Cordel Support support@cordel.ai.
Offline Data Validation In The Field Using Cloud Sync
To prevent the need to revisit and recapture data at a later date, users should validate data at the end of each capture.
No internet connection is required to perform this check.
-
Go to C:\Users\<USERNAME>\AppData\Local\Cordel\Data (A shortcut to this folder is also available on the OBC desktop page)
-
Search for the folder with today’s capture date and open it. Open 3-5 .MP4 video files and check if they open and can be played/viewed.
-
Open the Cordel Cloud Sync application.
-
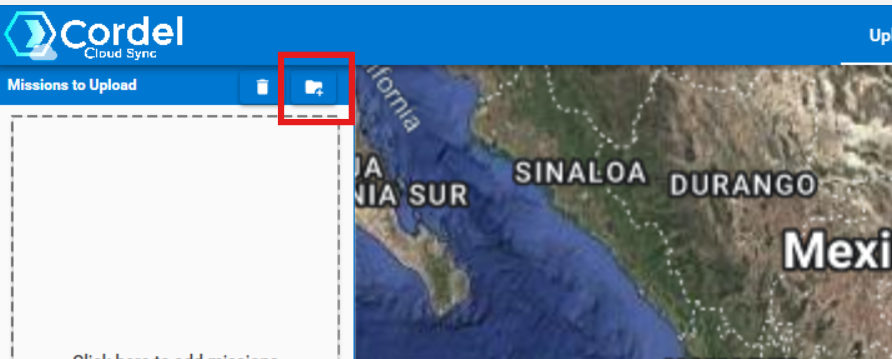
Click the ‘Select Directory’ icon above the file list
-
Select all missions inside today’s folder and click upload
-
Check the map has a continuous blue line, indicating data has been captured continuously.
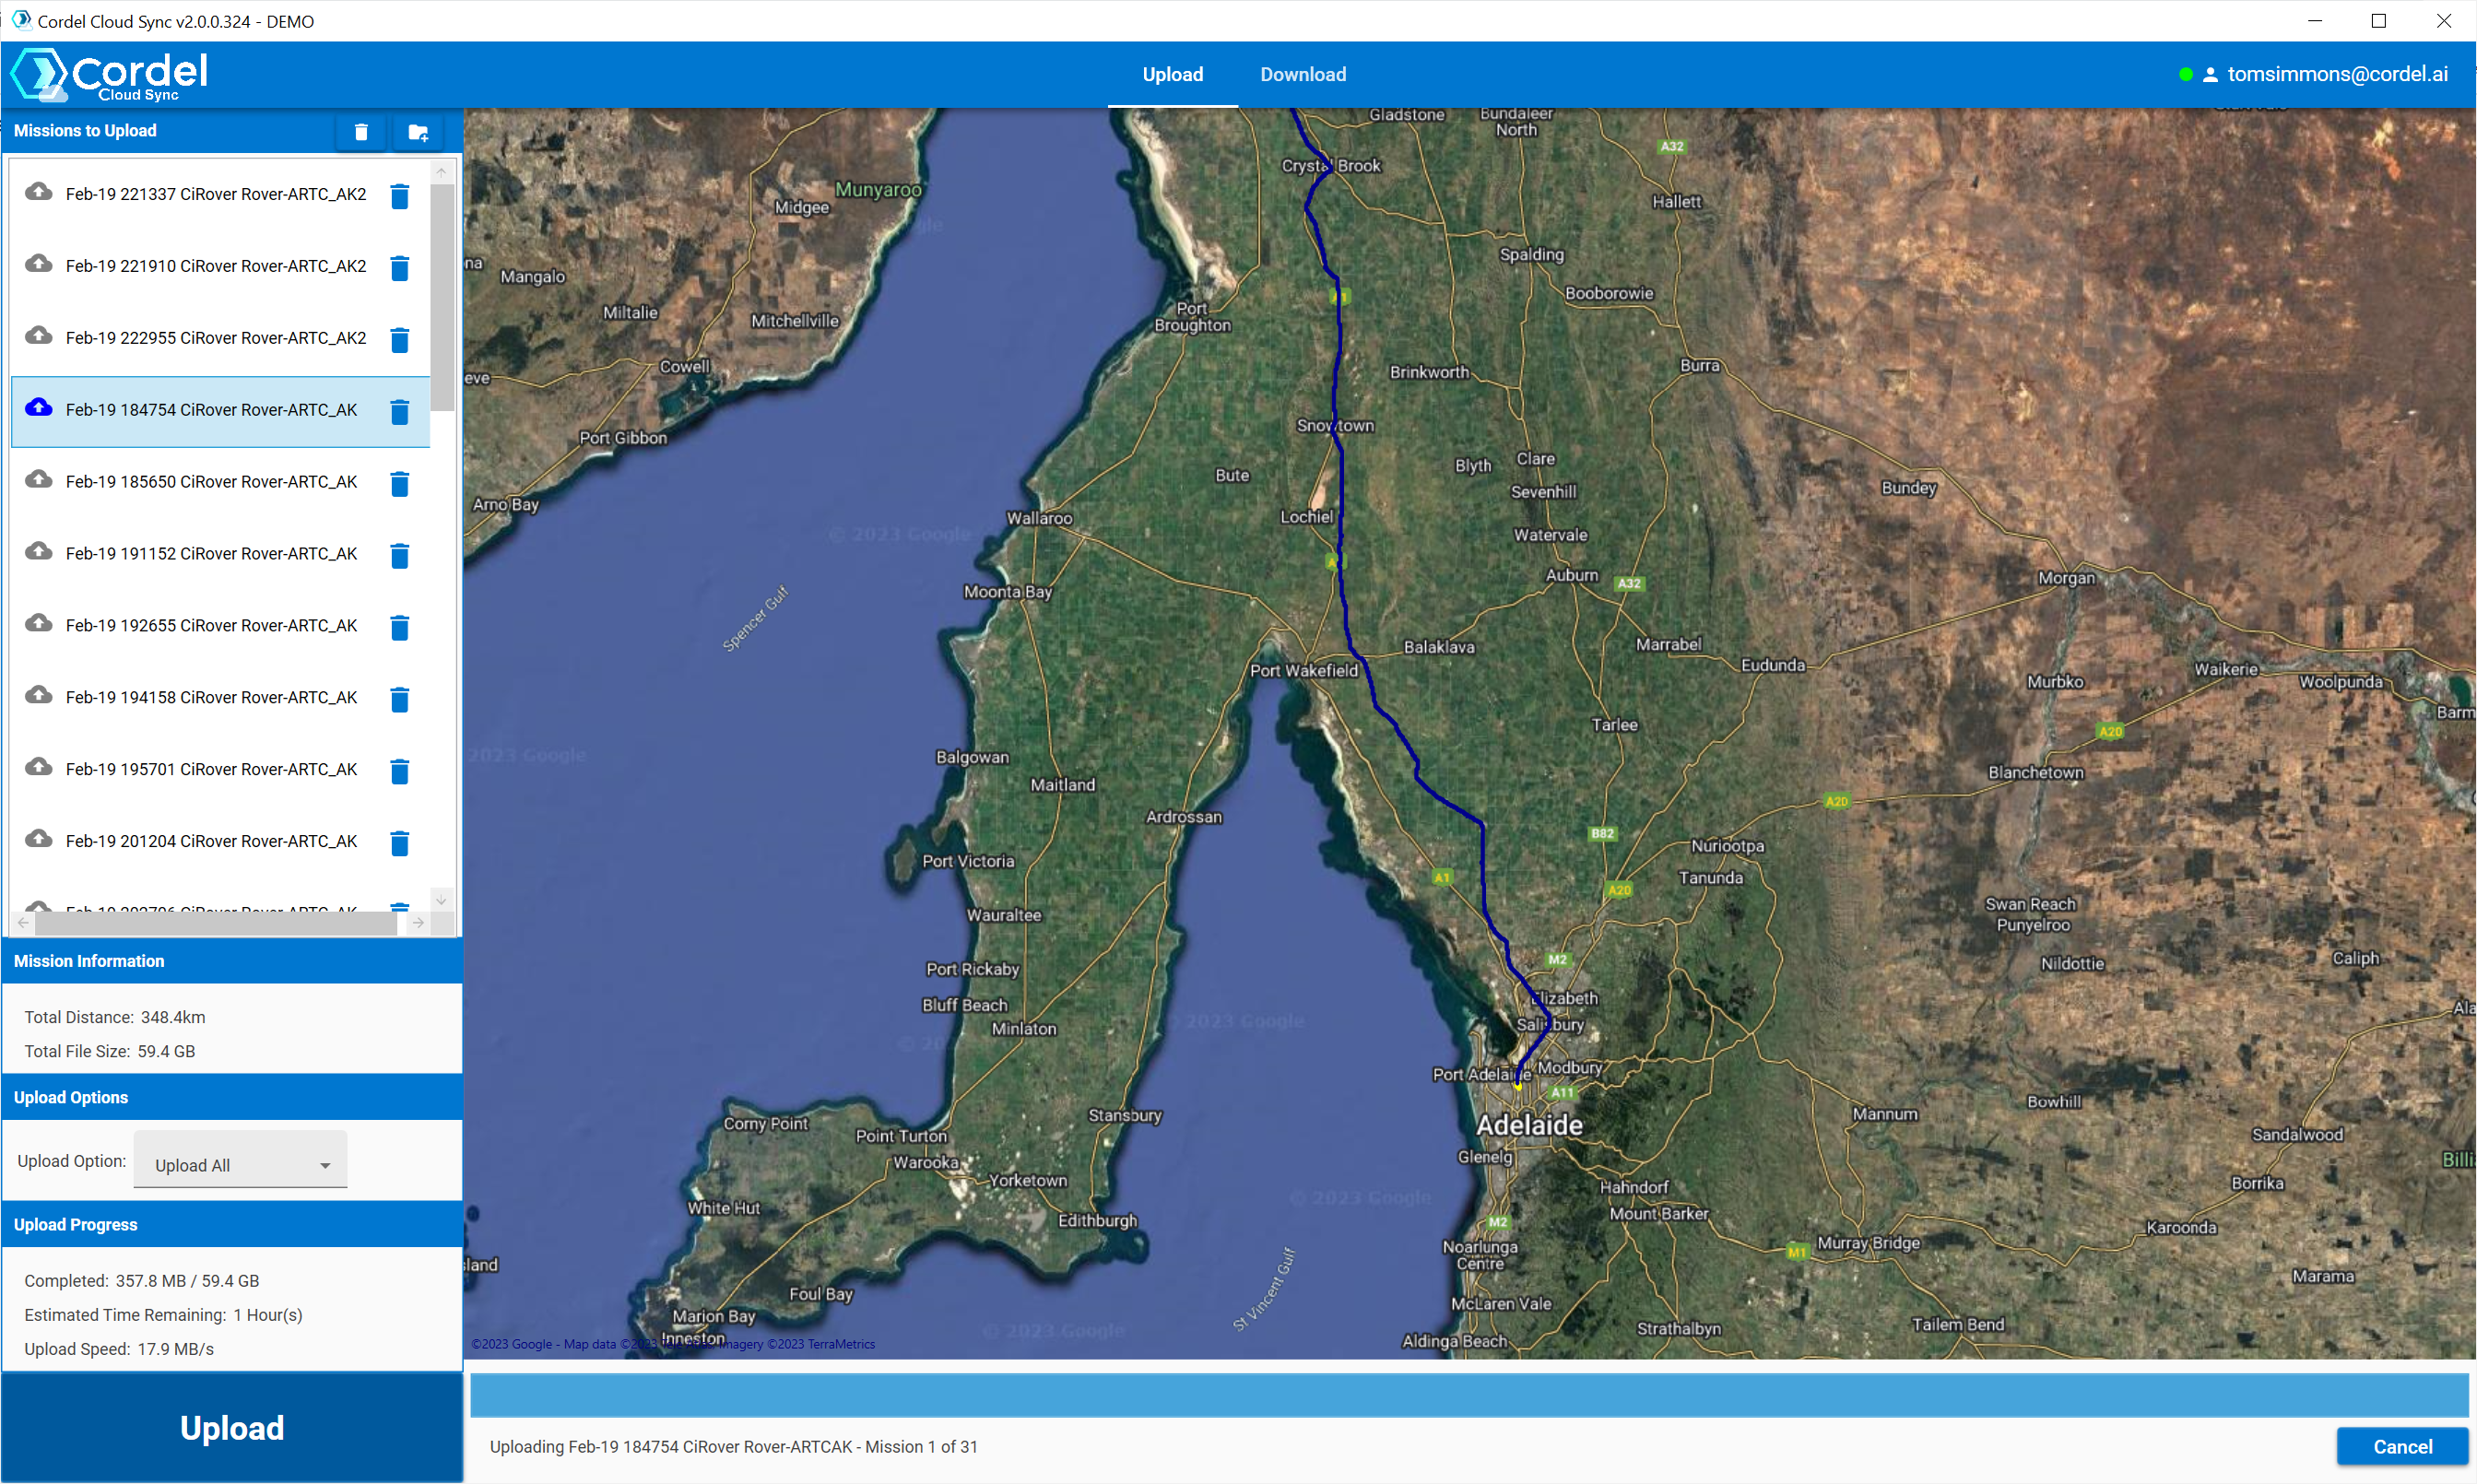
A continuous blue line indicates good capture
What to do if data has not been captured successfully
-
Re-capture any missing sections of the track
-
Contact Cordel Support support@cordel.ai
Data Management
Syncing data between the Capture Hardware and the Host Machine (DI or Toughbook)
Data Sync between Cordel Capture hardware and the Host Machine
Manual Capture Mode: When capture is manually stopped, data begins to synchronize between the hardware unit and the Host Machine automatically.
Automatic Capture Mode: Data is automatically synchronized between the hardware unit and the Host Machine during capture - at the conclusion of every mission (typically every 15 minutes)
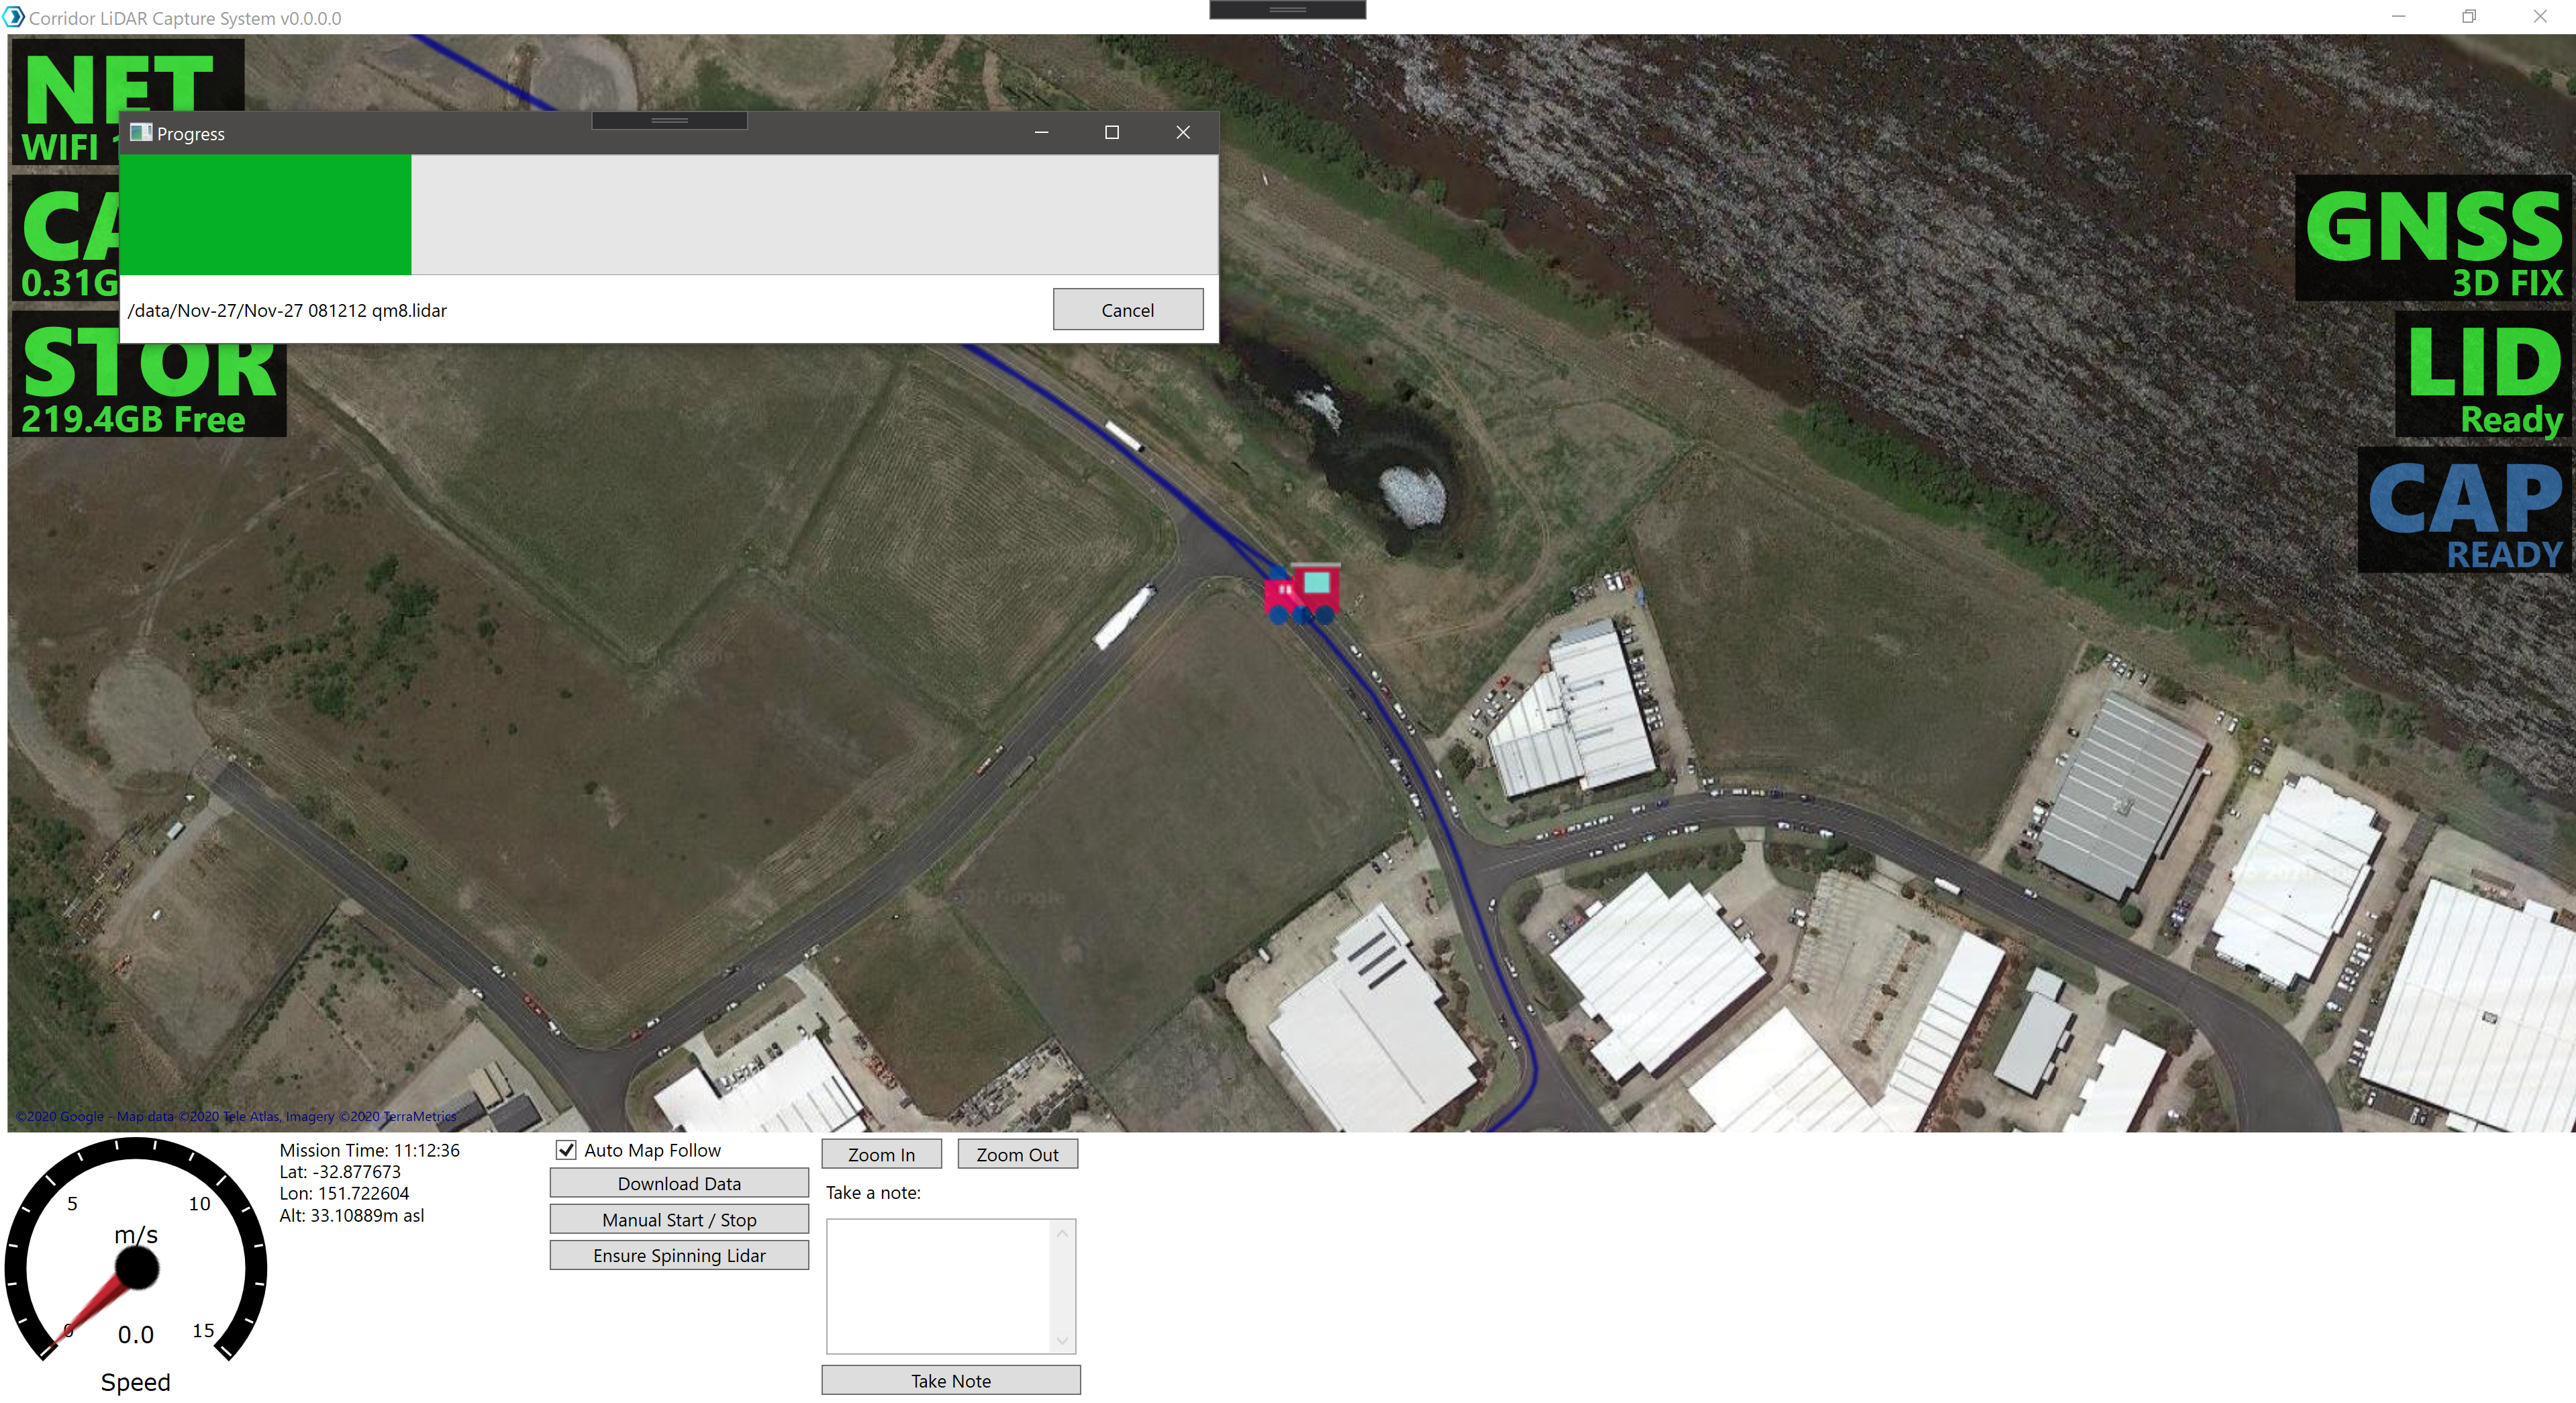
Ground Station: Automatic Data Synchronization
For “unmanned systems” Ground Station can be configured compare the data on the hardware unit to the data on the Host Machine on start up.
If there are files on the Hardware unit that aren’t present on the Host Machine, Ground Station will launch the data download tool.
Ground Station: The Manual Data Download tool
Users can manually transfer data from the Cordel capture hardware to the Host Machine at any time.
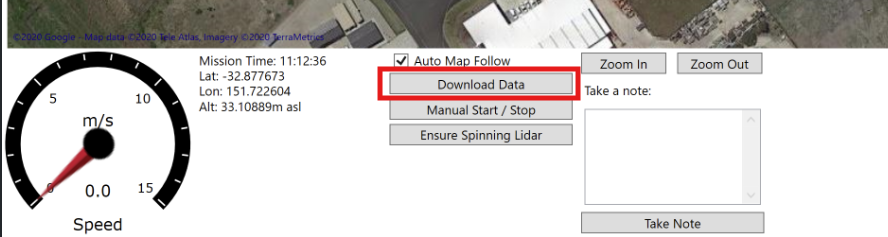
When the Download Data tool is launched, a list of all missions currently stored on the Cordel Hardware is displayed. Files will be shown in green or white:
🟩 Green Files: Items that have been successfully transferred to the Host Machine
⬜ White Files: Items that have not been transferred to the Host Machine
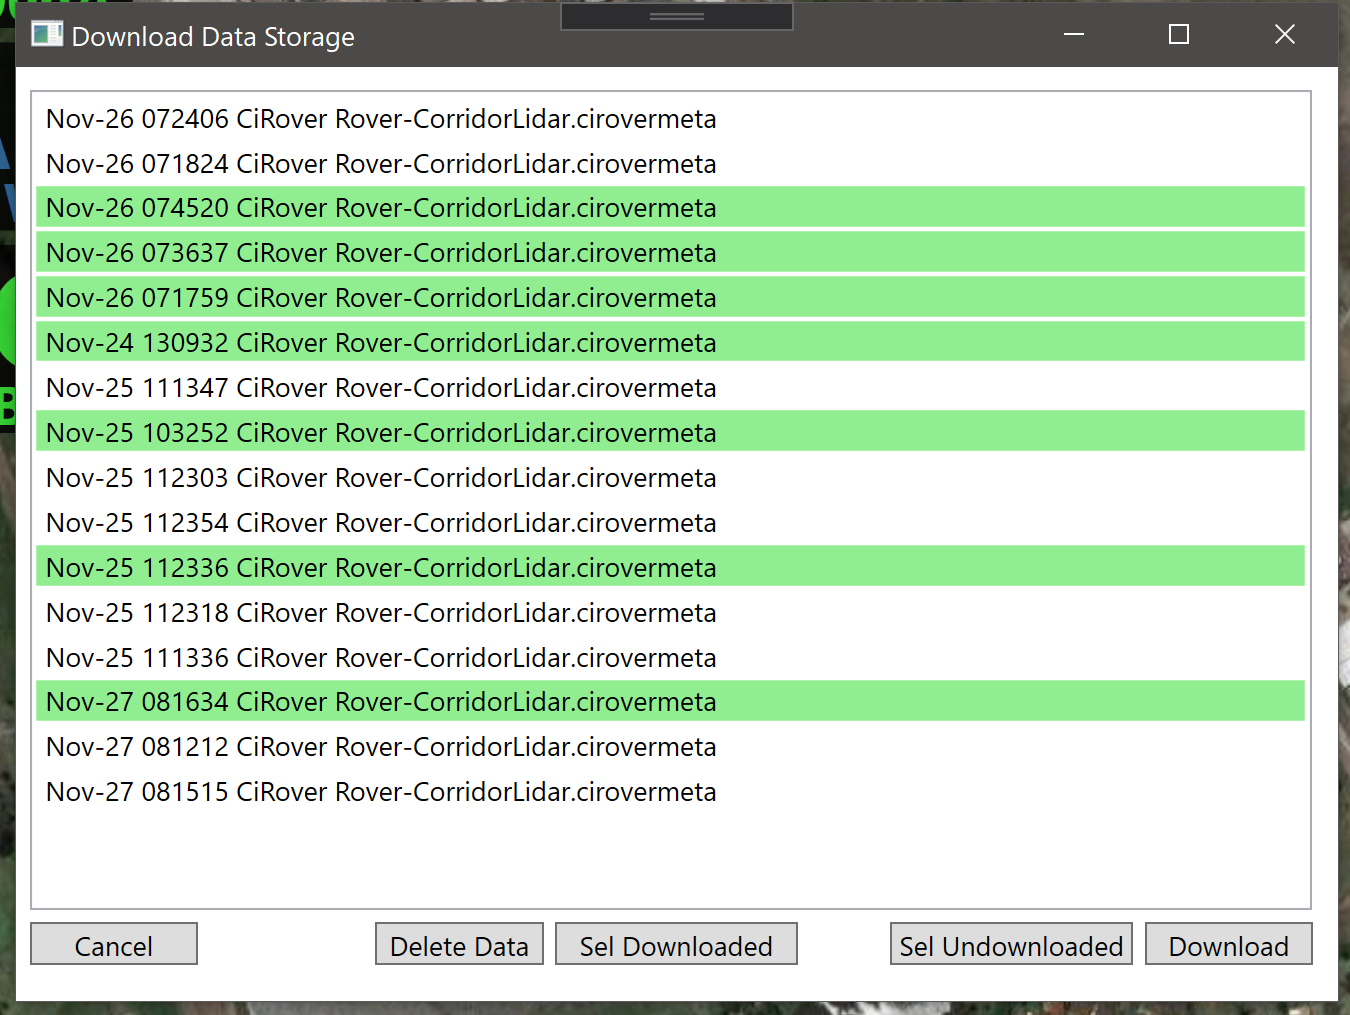
It is recommended this function be utilized at the conclusion of each capture, to ensure all data is successfully transferred to the Host Machine. Cordel Hardware operates a FIFO data buffer - which will delete old captured data to make room for new data.
Transferring data from the Host Machine to External Storage Devices using Copy/Paste
Usually, this process is completed at the end of the capture day.
Users should transfer today’s data into an external drive by copying the folder with today’s date from C:\Users\<USERNAME>\AppData\Local\Cordel\Data to an external hard drive.
Transferring data from the Host Machine directly to Cordel Connect using Cloud Sync
-
Login to Cloud Sync
-
Load the .cirovermeta for each mission you wish to upload via the ‘Select Directory’ option above the file list. Select a directory or a single file.
Note: selected data is shown in the “Mission to Upload” list, and the associated trajectory is displayed on the map.
-
Click ‘Upload All’
Cloud Sync displays the progress of each file and the combined set of files, including transfer rates:
-
Once the associated data has been uploaded, it will be available in Cordel Connect as ‘uploaded’.
How To Check Data Quality Using Cloud Sync
The “Mission to Upload” list in Cloud Sync represents the quality of each mission using one of three icons:

The mission has been loaded successfully with no errors or warnings. This mission can be uploaded without further checking

The mission has been loaded but has warnings. This mission can still be uploaded - but the user should verify the message/s reported

The mission is corrupt. This mission cannot be uploaded and the user should review messages and confirm mission data has been copied correctly
How To Use Cordel Connect To Monitor Data Capture
Cordel Ground Station is paired with Cordel Connect, which provides users with access to the web platform the ability to view the location and status of their Cordel capture equipment.
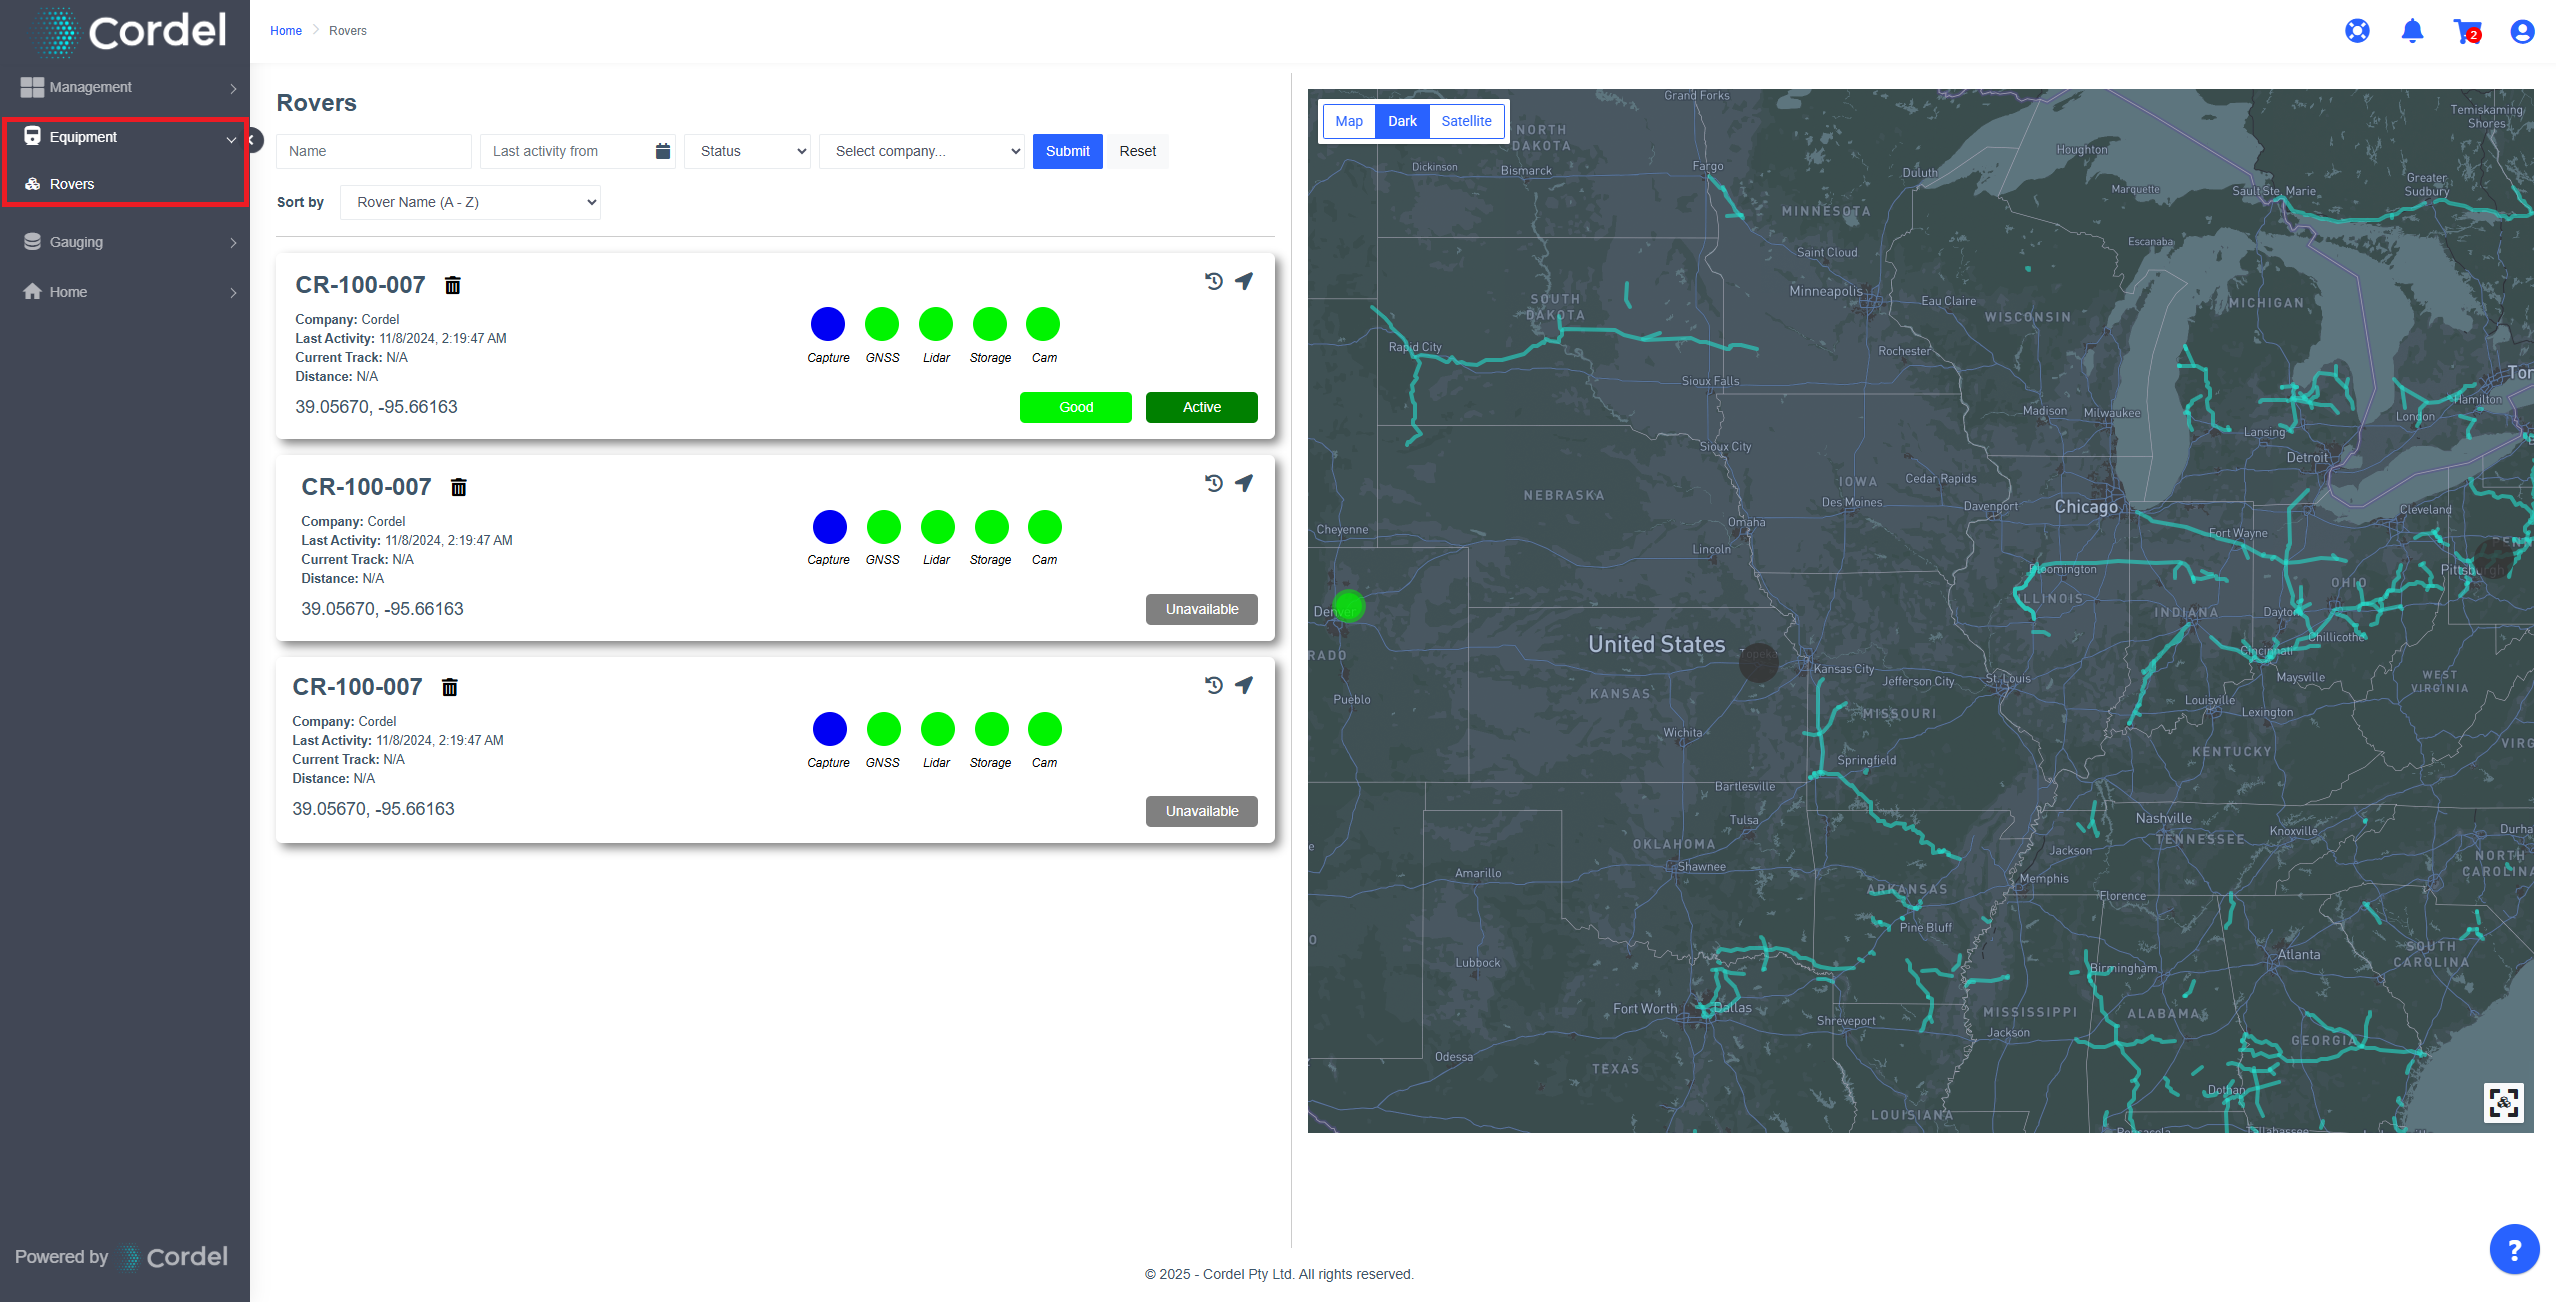
Login to Cordel connect and go to Equipment> Rovers.
Each Rover has an information card and a colour coded map marker that provides a quick visual indication of the overall state of each device, as well as the health of each individual sensor.
When viewing a Rover marker on the map, the marker is coloured according to the overall status of the Rover:
🟩 Good. The device is fully operational.
🟦 Ready. The device is ready to capture.
🟨 Warning. There may be issues with the device, or the device isn’t fully functioning.
🟥 Error. There is something wrong with the device.
⬛ Unavailable. The device is not connected to power or is out of 4G service.