

Ground Station can be configured to automatically copy captured data to an attached hard drive. This guide covers how to enable and utilise this functionality.
For information on how data is transferred from the Rover to the Ground Station host machine, refer to (V4.0) How Transfer Data From Cordel Capture Hardware To Ground Station.
How the USB copy feature works
When ‘Enable USB Copy’ is selected in Ground Station and an external drive is connected to the host machine, Ground Station detects it and automatically begins copying data from the host machine’s storage to the drive. Missions are copied in order from oldest to newest.
Once a mission has been successfully copied, it is marked as CopiedToUsb in Ground Station. It will not be copied again — to the same drive or any subsequent drive. On restart, Ground Station detects the drive and resumes the copy, but only for missions that have not yet been transferred or where a previous transfer did not complete.
The USB copy feature and Cordel Cloud Sync cannot be enabled at the same time. If Cloud Sync upload is enabled, the USB copy option is unavailable.
Prerequisites
-
Ground Station v5.12.0 or later installed on the host machine
-
The host machine has data that has been synchronised from the Rover.
-
A USB 3.0 drive with sufficient free space for mission data to be copied onto
-
Cordel Cloud Sync upload functionality is disabled
If you are currently using Cordel Cloud Sync to transfer data, see (V4.0) How To Transfer Data From Ground Station To Cordel Connect.
Steps
Enable USB copy
The USB copy feature state is saved between sessions. Once enabled, it will remain enabled until it is disabled.
-
Open Ground Station on the host machine.
-
Locate the 'USB Copy Enabled' checkbox in the bottom-right corner of the main screen.
-
Tick the checkbox to enable USB copy.
Note: If Cloud Sync upload is enabled, the 'USB Copy Enabled' checkbox is greyed out. Disable the Cloud Sync upload before attempting to enable USB copy.
Connect a USB drive
-
Insert a USB drive into a USB 3.0 port on the host machine.
-
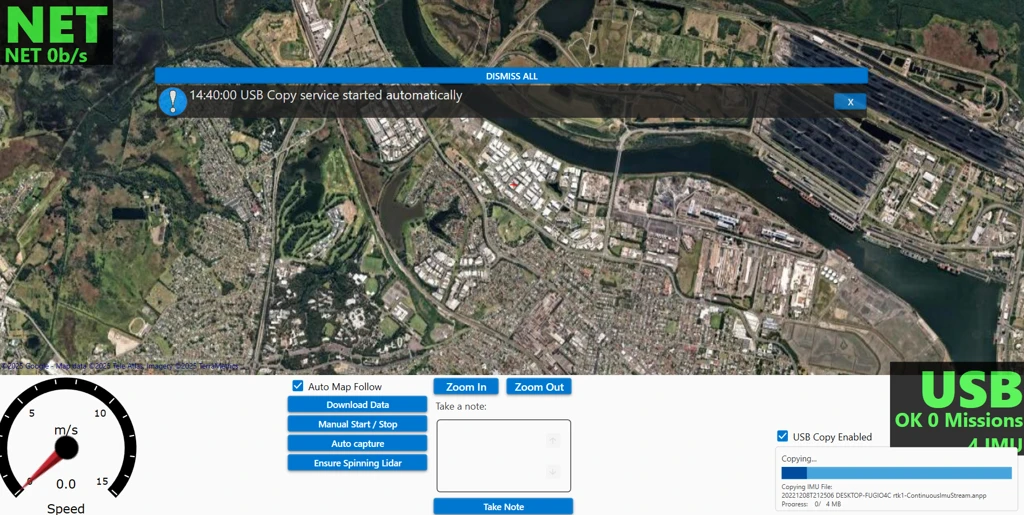
Ground Station detects the drive automatically. The USB connected status indicator turns green.
-
If missions are available to copy, the notification "USB Copy service started automatically." appears and the transfer begins immediately.
-
A transfer progress bar and the number of missions transferred are displayed in the UI.
If no missions are pending, Ground Station displays: "USB drives available: [drive name] ([available space])"
Connect a USB drive during an active mission
If a USB drive is connected while a capture mission is in progress:
-
Ground Station scans and detects the new drive. The USB connected status indicator turns green.
-
Mission data is copied in order of creation time as it becomes available.
-
Copying continues until the capture operation completes.
Monitor and manage storage during transfer
Ground Station checks available space on the USB drive before copying each mission.
-
If the next mission in the queue is too large, Ground Station skips it and attempts to copy the next smaller mission instead.
-
This continues until no remaining missions can fit on the available drives.
-
When no drives have sufficient space for any pending missions, Ground Station displays: "ERR No USB Space: No drives have sufficient space. Please free up space or connect additional drives."
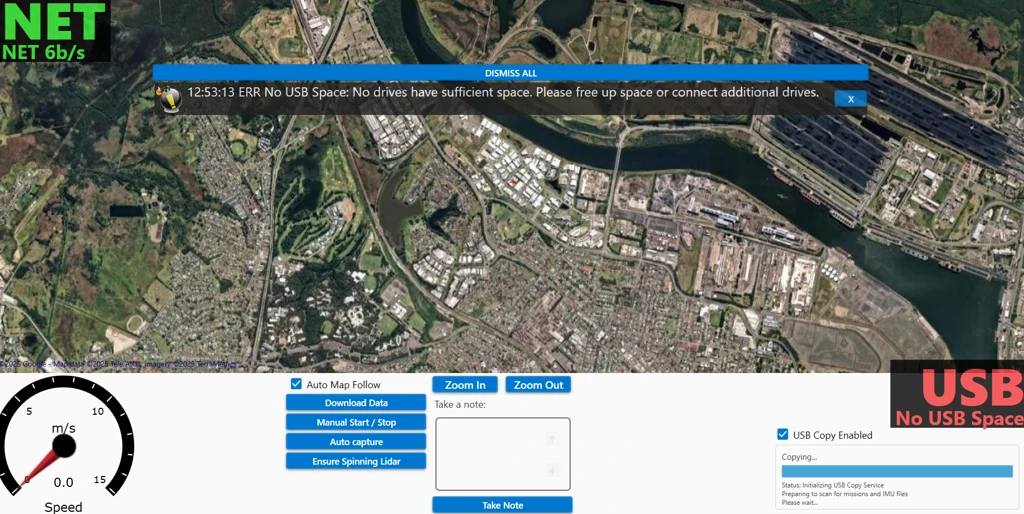
To continue: free space on an existing drive, or connect an additional USB drive. Ground Station detects the new drive automatically and resumes the copy.
Connect multiple USB drives
Ground Station supports multiple USB drives connected simultaneously.
-
All connected drives are detected and displayed.
-
After each mission transfer, Ground Station selects the drive with the most available space for the next mission.
-
If a new drive is connected during an active transfer and has more available space than the current drive, the next mission copies to that drive. A notification is displayed to indicate the change.
Disconnect and reconnect a drive during capture
You can unplug and reconnect USB drives while capture is in progress.
-
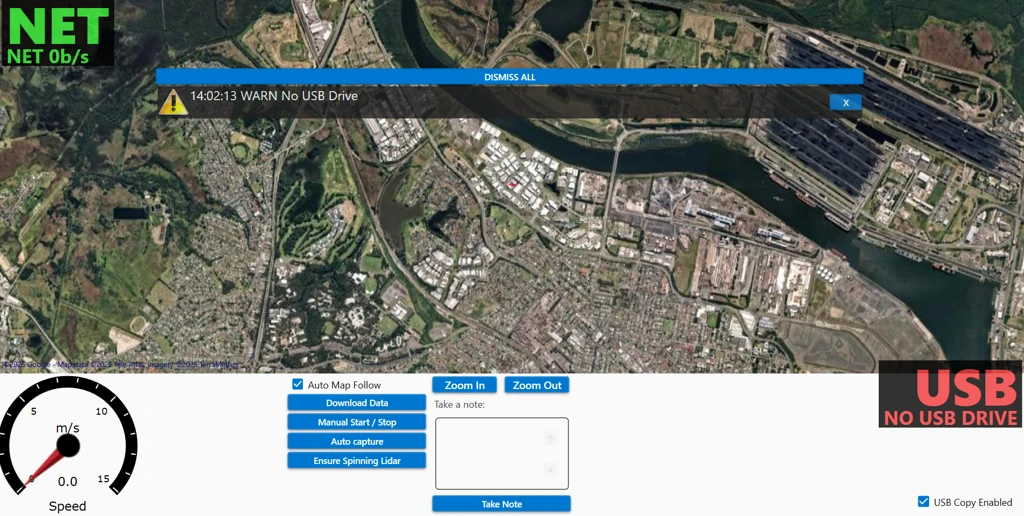
If a drive is disconnected during a transfer, the copy pauses and Ground Station displays: "WARN No USB Drive."
-
The transfer resumes automatically when a drive is reconnected: "USB Copy service started."
-
Partial transfers are retried automatically. The mission is not skipped.
Expected result
After the transfer completes:
-
All missions that fit on the connected drive are present on the USB drive.
-
Each copied mission is marked as
CopiedToUsbin Ground Station. These missions will not be re-copied on subsequent sessions. -
The original mission data remains on the host machine.
-
On the next power-up, Ground Station detects the drive and copies any missions not yet marked as
CopiedToUsb.
Troubleshooting
|
Symptom |
Probable cause |
Resolution |
|---|---|---|
|
'USB Copy Enabled' checkbox is greyed out |
Cloud Sync upload is enabled |
Disable the Cloud Sync upload, then enable USB copy |
|
Transfer pauses with "WARN No USB Drive." |
Drive was disconnected |
Reconnect a drive; transfer resumes automatically |
|
"ERR No USB Space" notification |
All connected drives are full or have insufficient space for remaining missions |
Free space on an existing drive or connect an additional USB drive |
|
Transfer does not start after connecting a drive |
No pending missions, or feature is disabled |
Confirm USB copy is enabled and that the Watcher has synchronised data from the Rover |
|
Previously transferred missions are not re-copied on restart |
Expected behaviour — missions marked |
No action required |
If the issue persists, contact Cordel Support.