

Note: Depending on the configuration of your Clearance Connect module, this functionality may be unavailable.
Slice Viewer Canvas
The Slice Viewer canvas displays a 2D cross-section of LiDAR point data at a specific location along the rail corridor. It renders slice points in relation to the structure gauge and rollingstock profile, and supports zooming, panning, and point selection. The toolbar provides tools to view and configure the display of the data shown on the canvas.
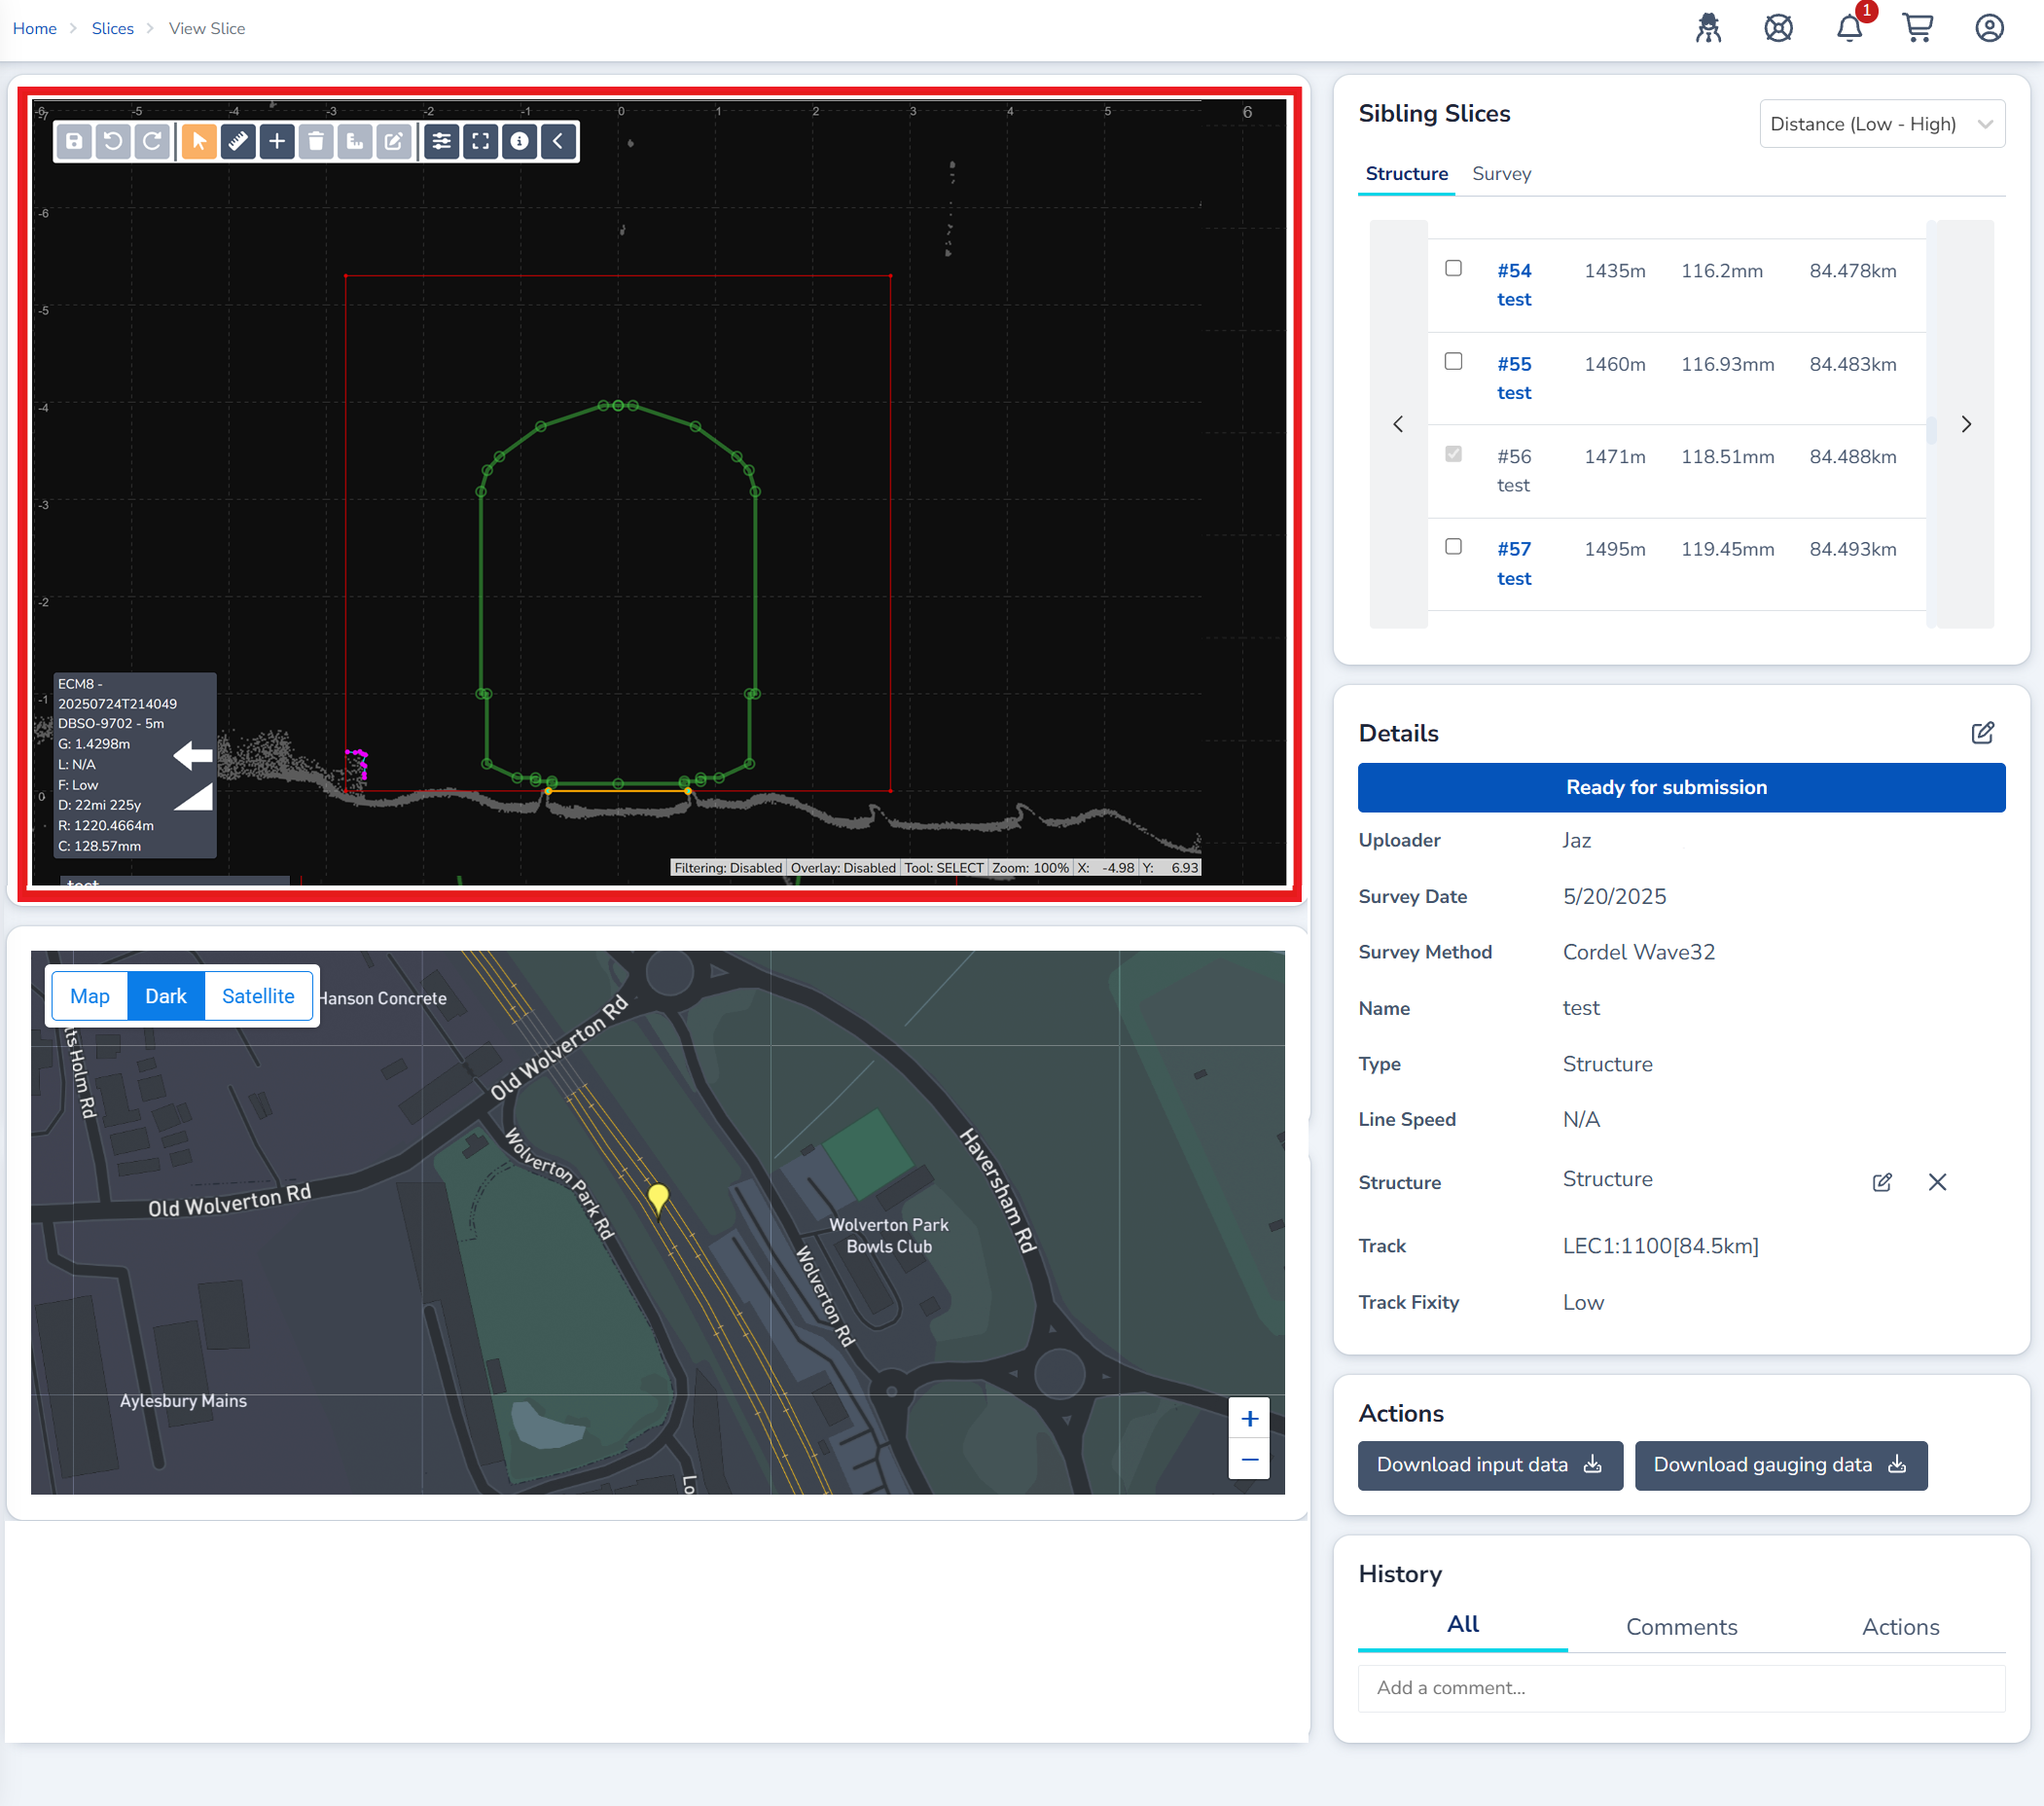
Navigating the Slice Viewer canvas
The slice points are rendered on a canvas that allows for zooming, dragging, and selection. Controls for these are as follows:
-
Left Click - Select point.
-
Left Click & Hold - Drag to draw selection box. All points within the selection box are then selected.
-
Middle Mouse Click & Hold - Drag to move around the view.
-
Middle Mouse Scroll - Zoom in and out of view.
The Fit View button is also available to reset the view of the slice. This button is highlighted in red below.
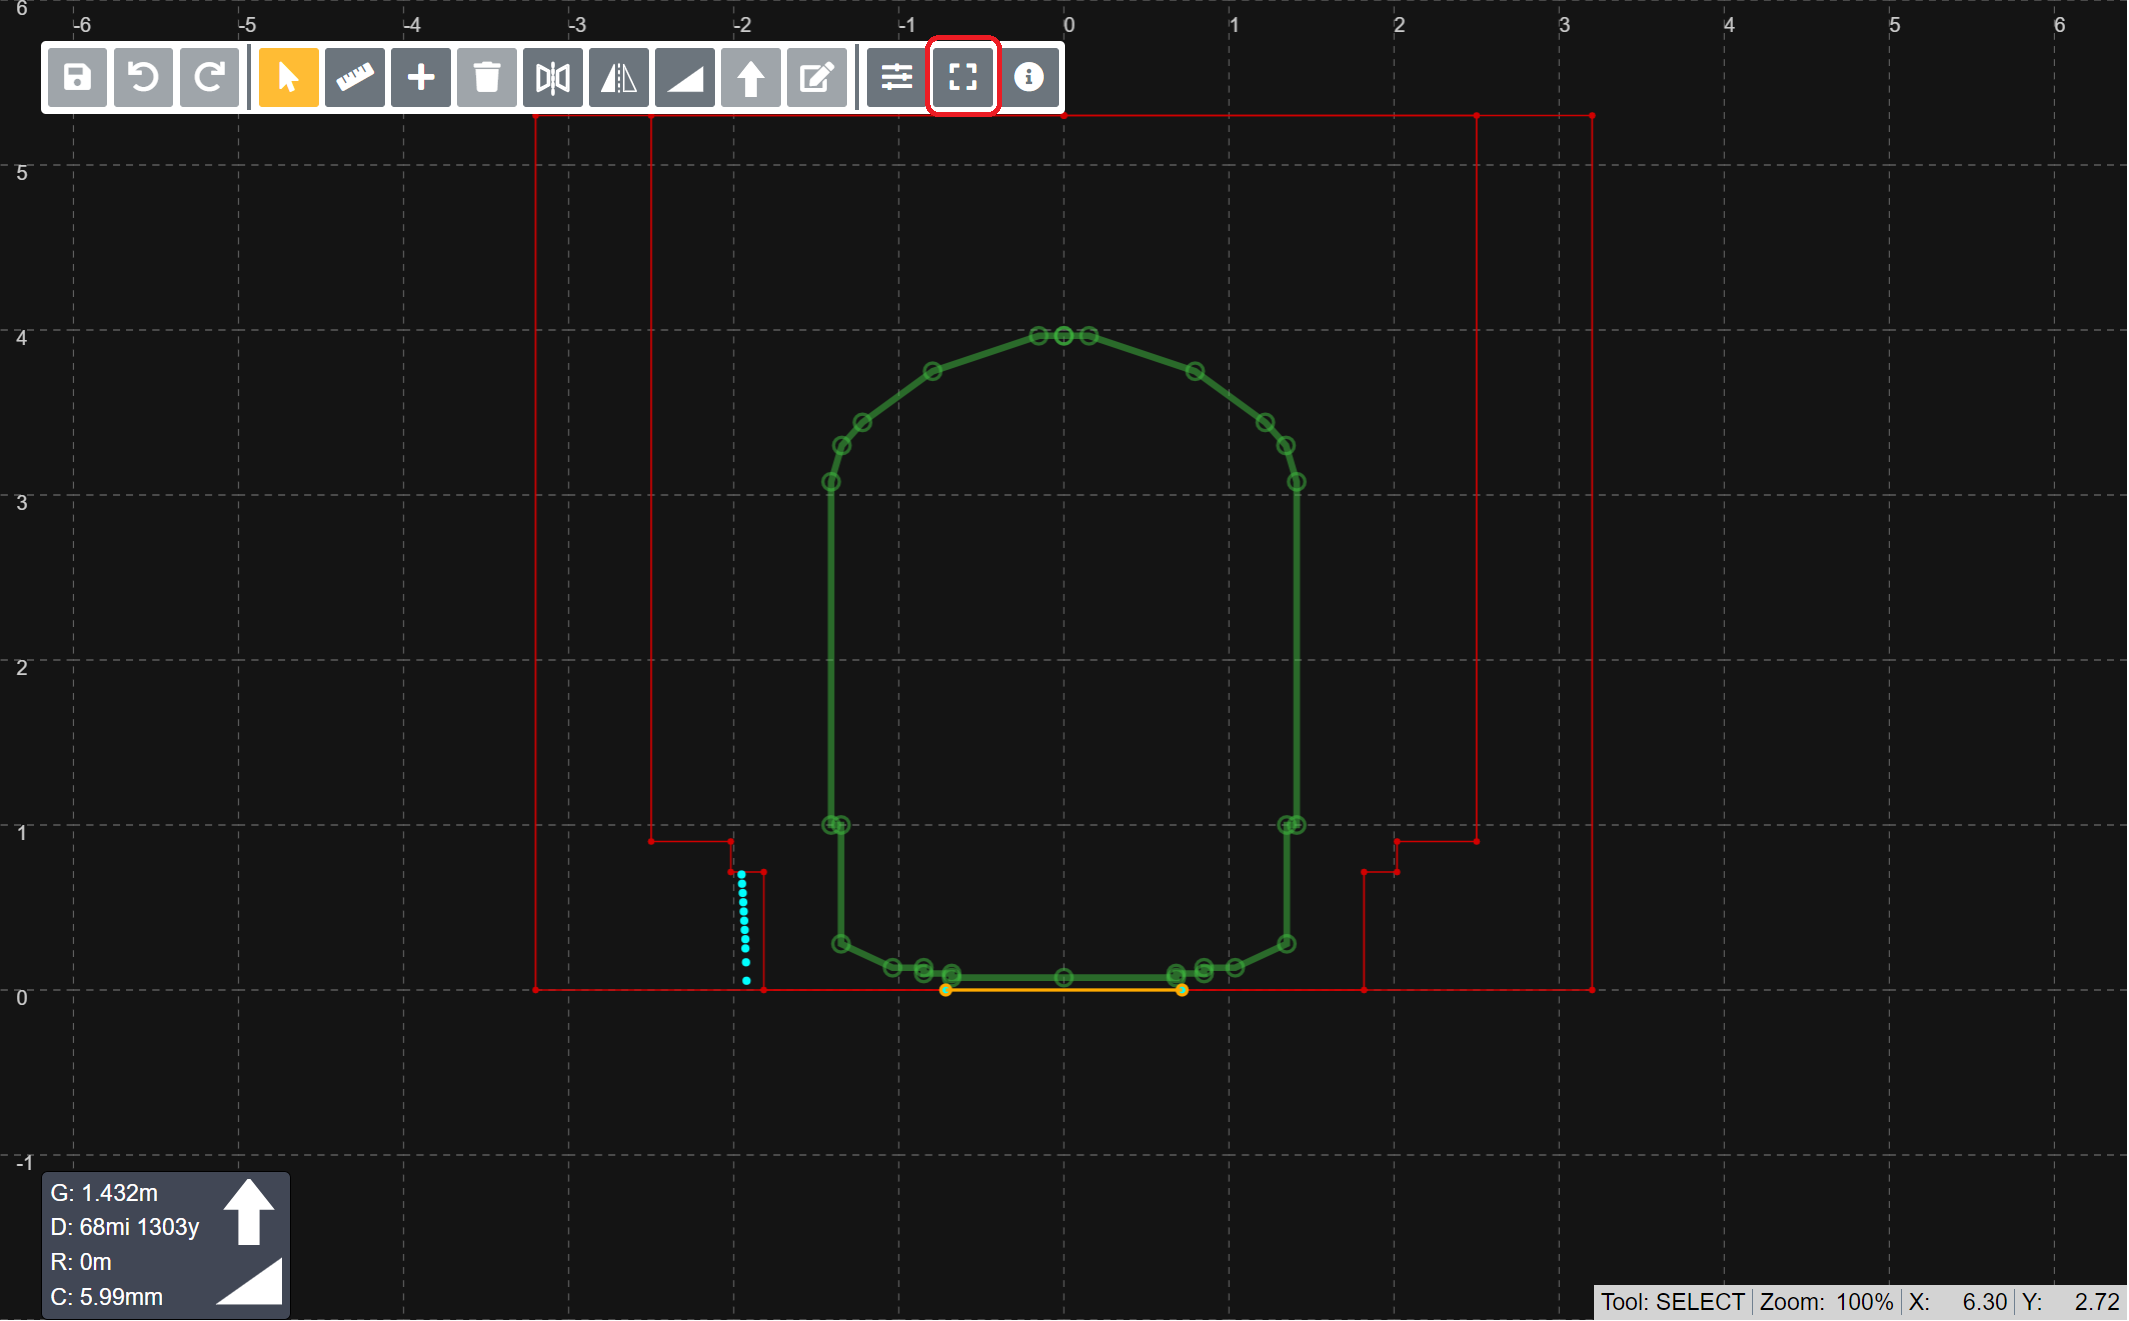
Slice Keyboard Shortcuts
The following shortcuts are defined for quicker Slice Viewer interaction:
-
Ctrl + Z - Undo Changes
-
Ctrl + Y - Redo Changes
-
Ctrl + S - Save Changes
-
Delete - Delete Selected Point/s
Slice Points
Slices are made up of multiple points which are displayed on the Slice Viewer canvas. Points can be selected and data can be edited using various tools in the toolbar.
Hovering over a point displays information such as point position, attribute value and distance to profile.
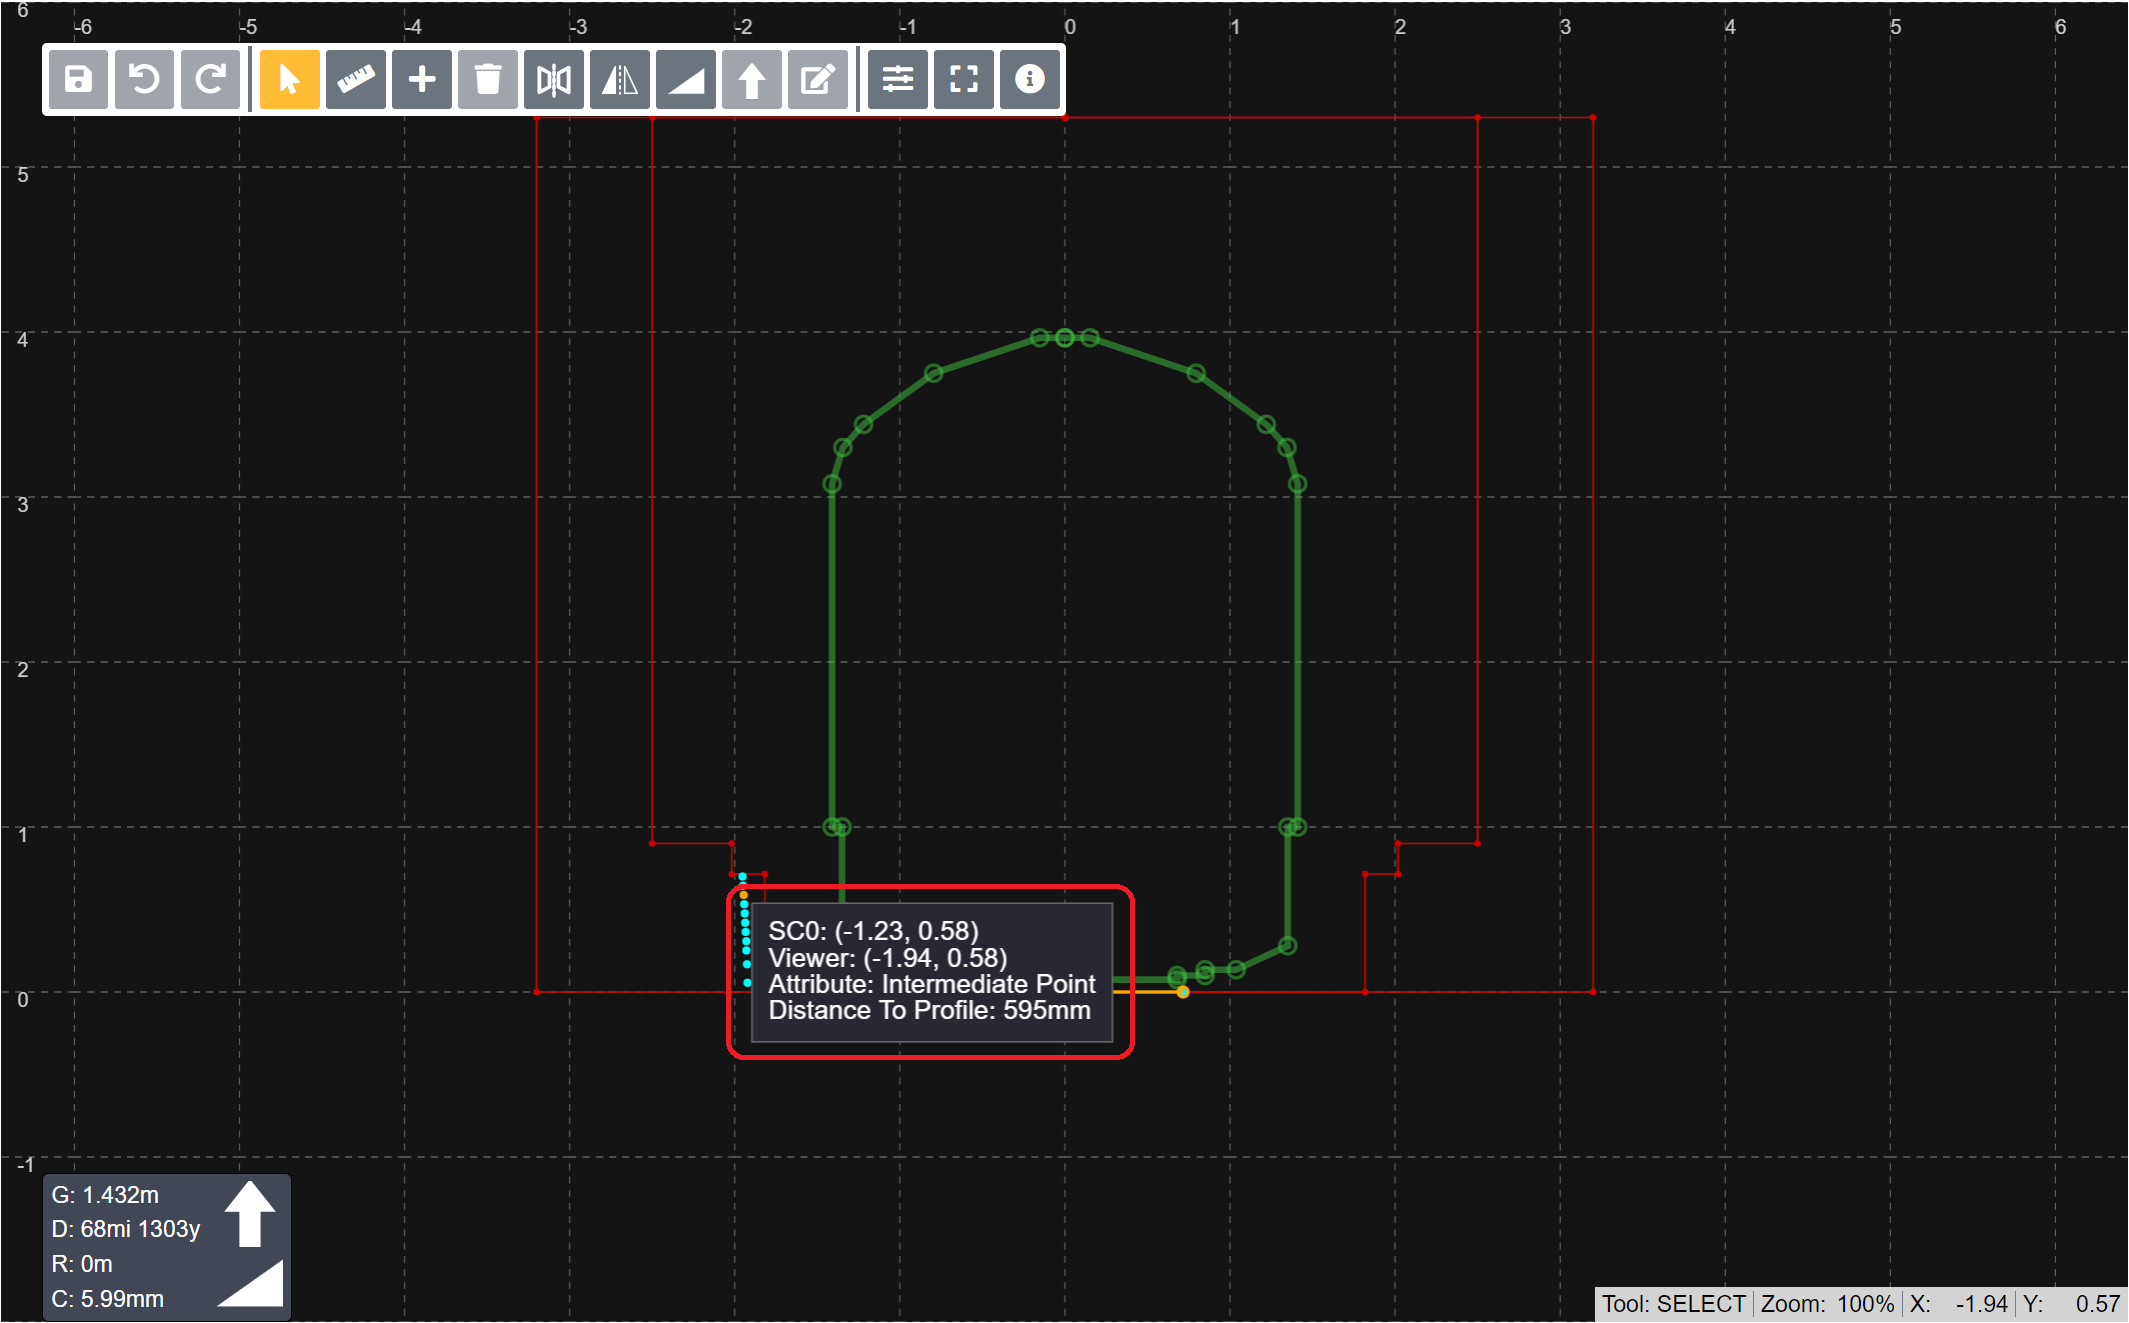
Co-ordinates
Both the SC0 co-ordinates and viewer co-ordinates are given.
The SC0 co-ordinates are the co-ordinates gathered from the measured points .SC0 files, and are calculated based on their position in relation to the left rail.
The Slice Viewer co-ordinates are the co-ordinates of the point on the canvas, plotted on cartesian plane.
Distance
The distance to profile is the distance between the point and the currently selected profile.
Attributes
Attributes describe the real world object a point represents and adhere to the legend shown below.
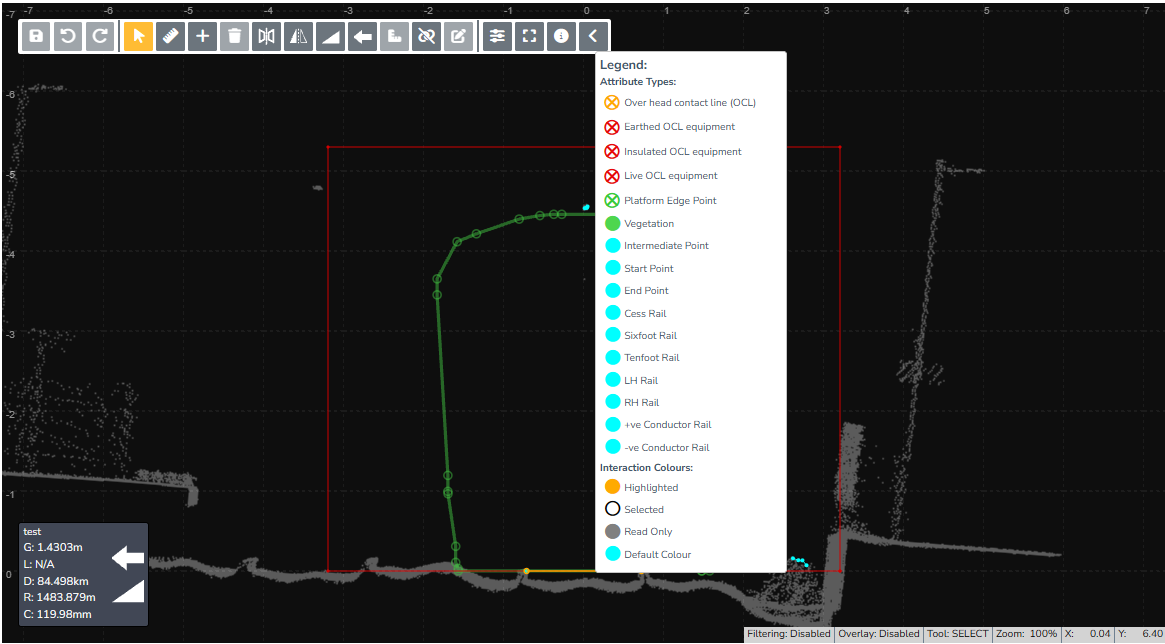
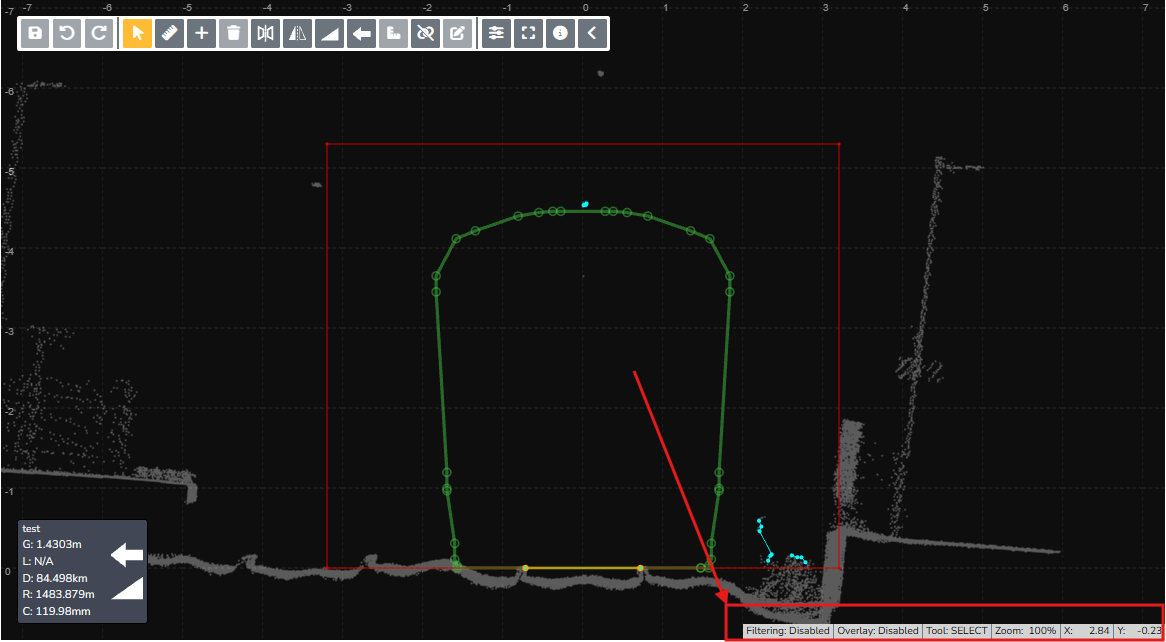
Slice Context
The context area provides users with information about the current selection, including:
-
The selected tool
-
Mouse X position
-
Mouse Y position
-
Zoom level
Slice Details
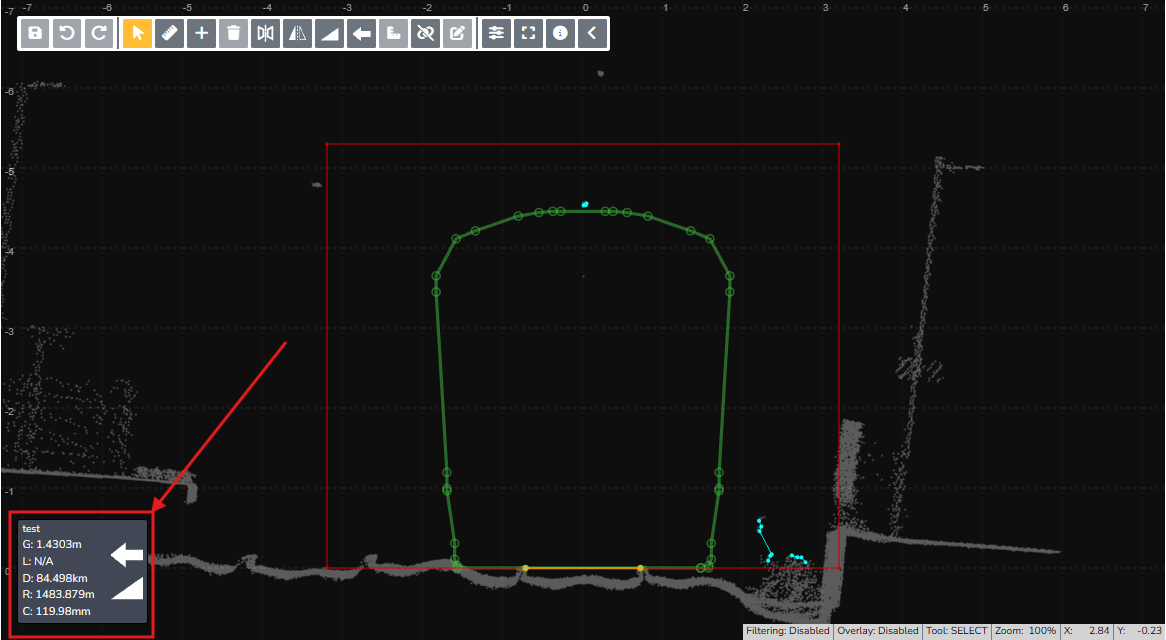
This tab gives the details of the current slice, and if available details of the superseded slice (displayed in same format if available). The following information is given:
-
Gauge (Clearance)
-
Distance
-
Radius (With associated direction indicator)
-
Superelevation (With associated slope indicator)
Slice Viewer Map
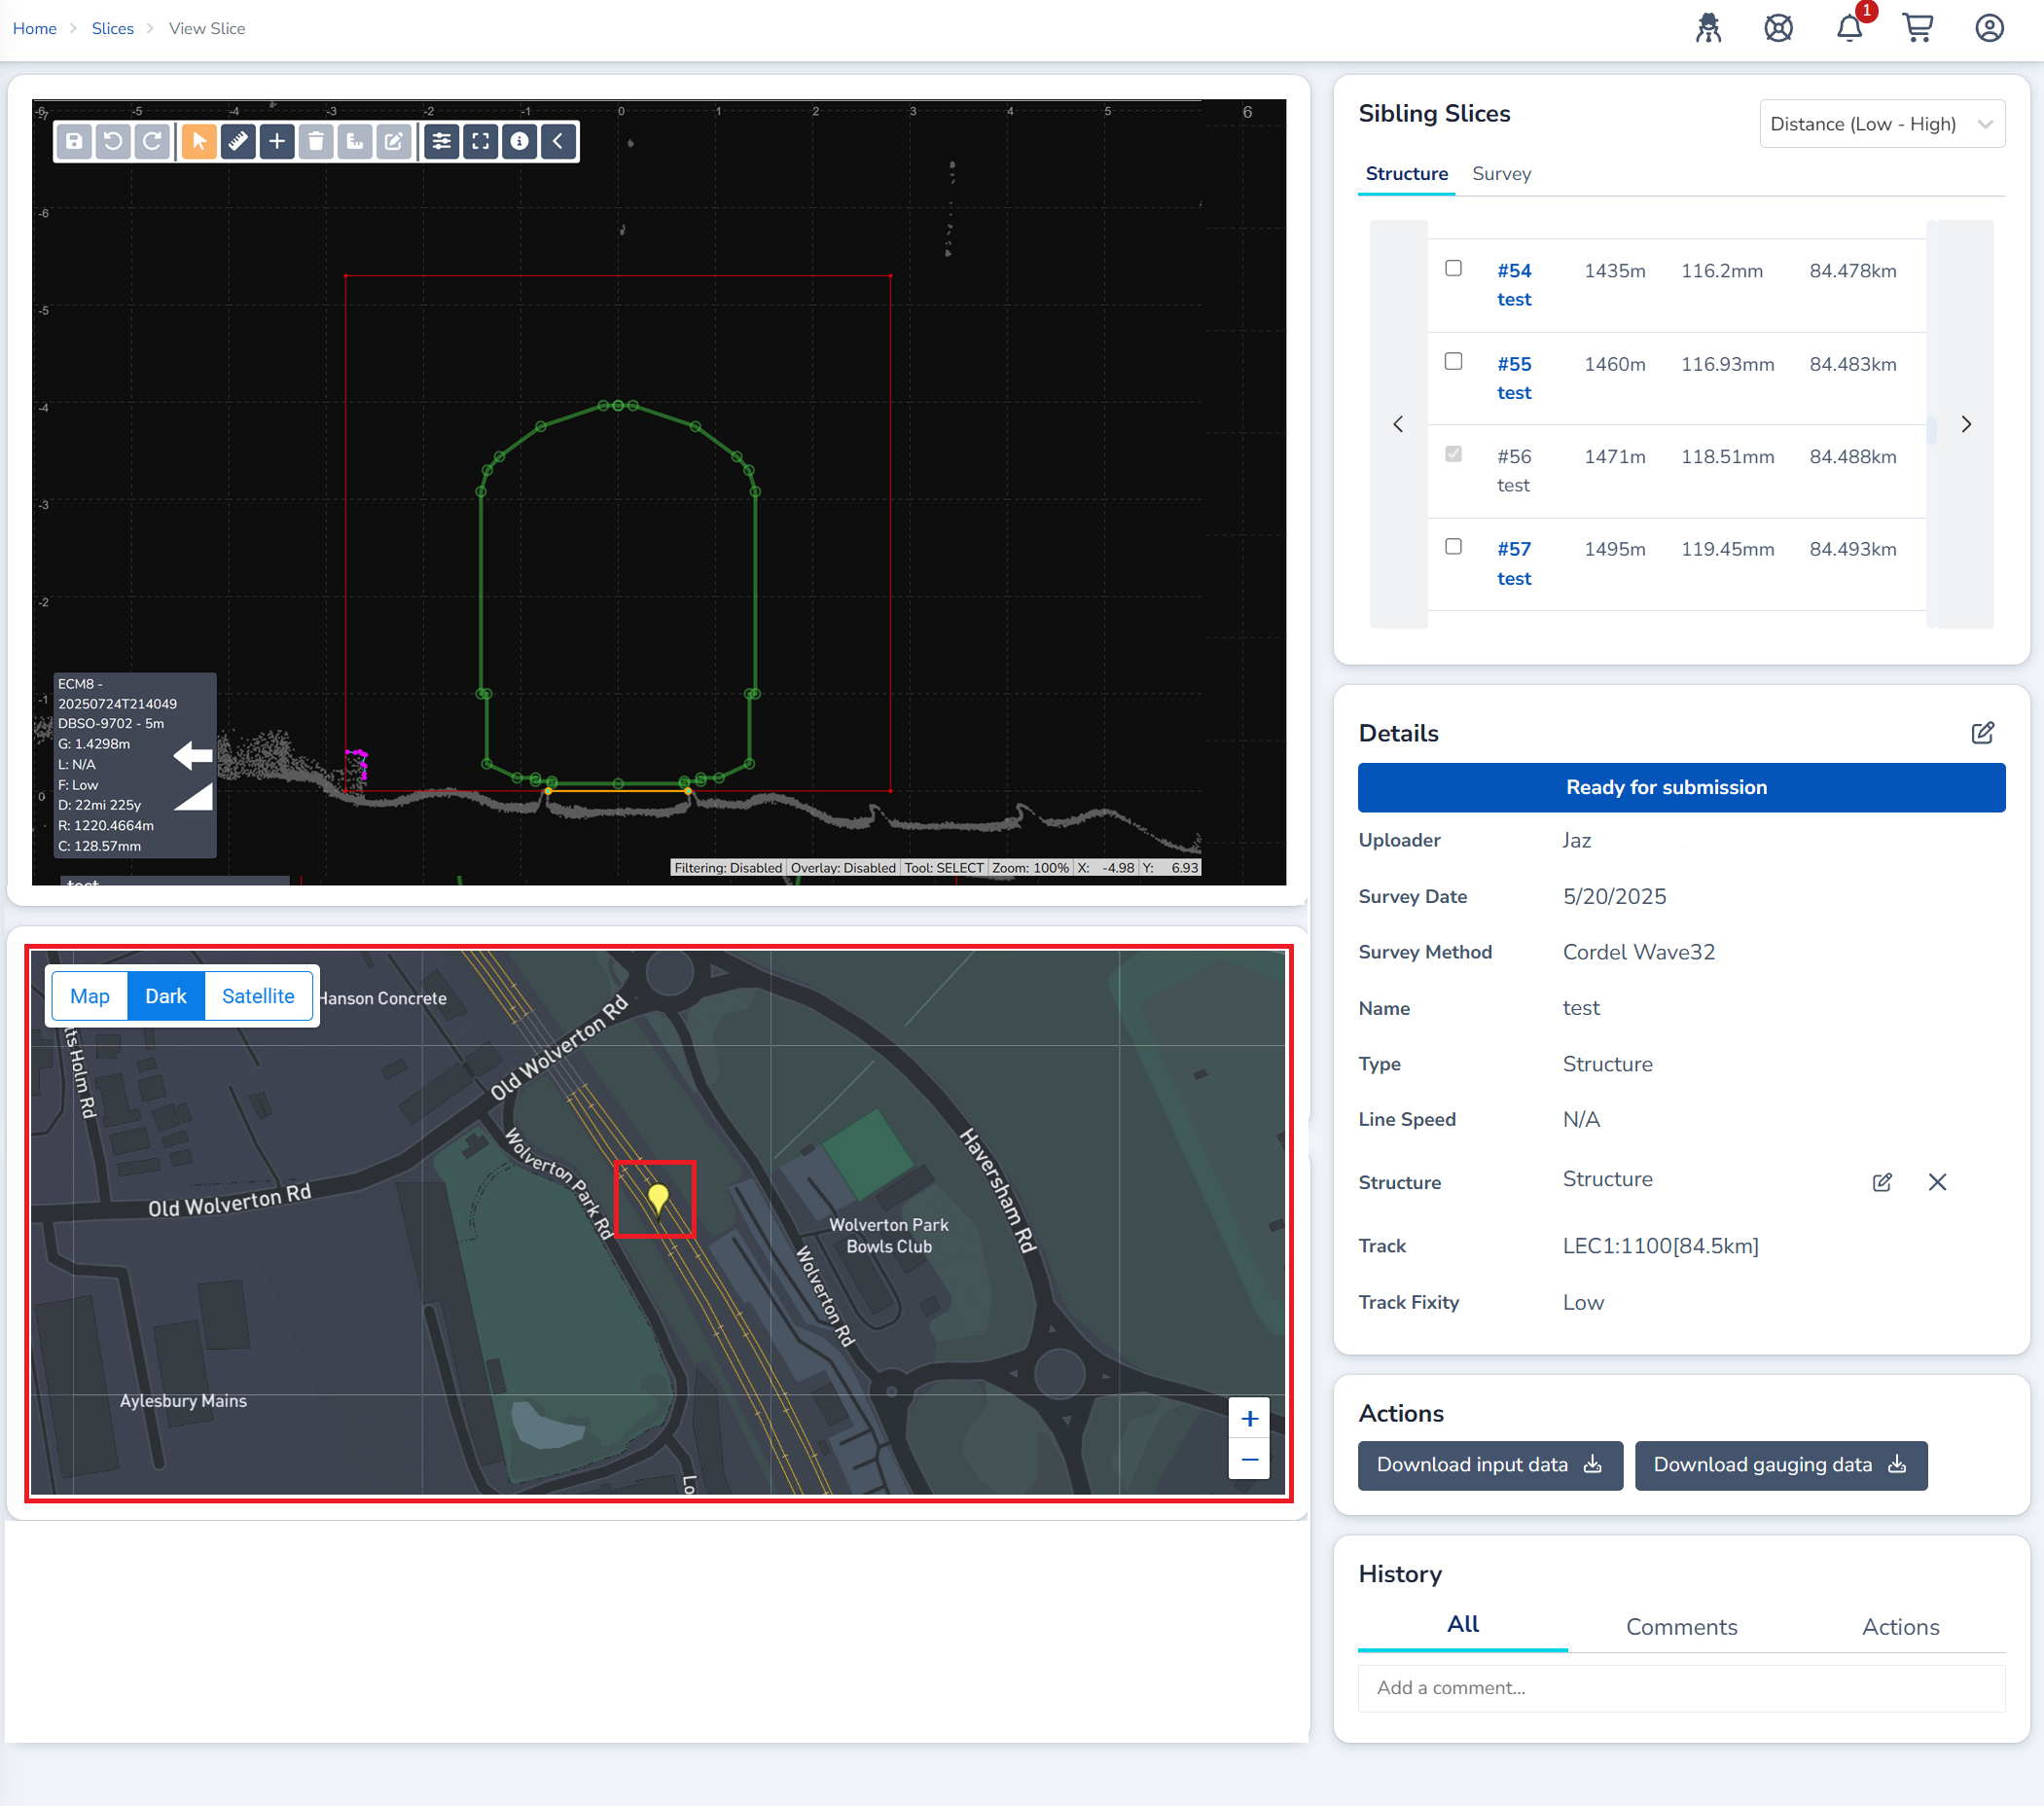
Each slice is represented with a pin on the map, indicating its real world position.
Users can select Map, Dark or Satellite map display depending on their preferences. There are also zoom in/out controls in the bottom right side of the map.
Slice Viewer Sibling Slices
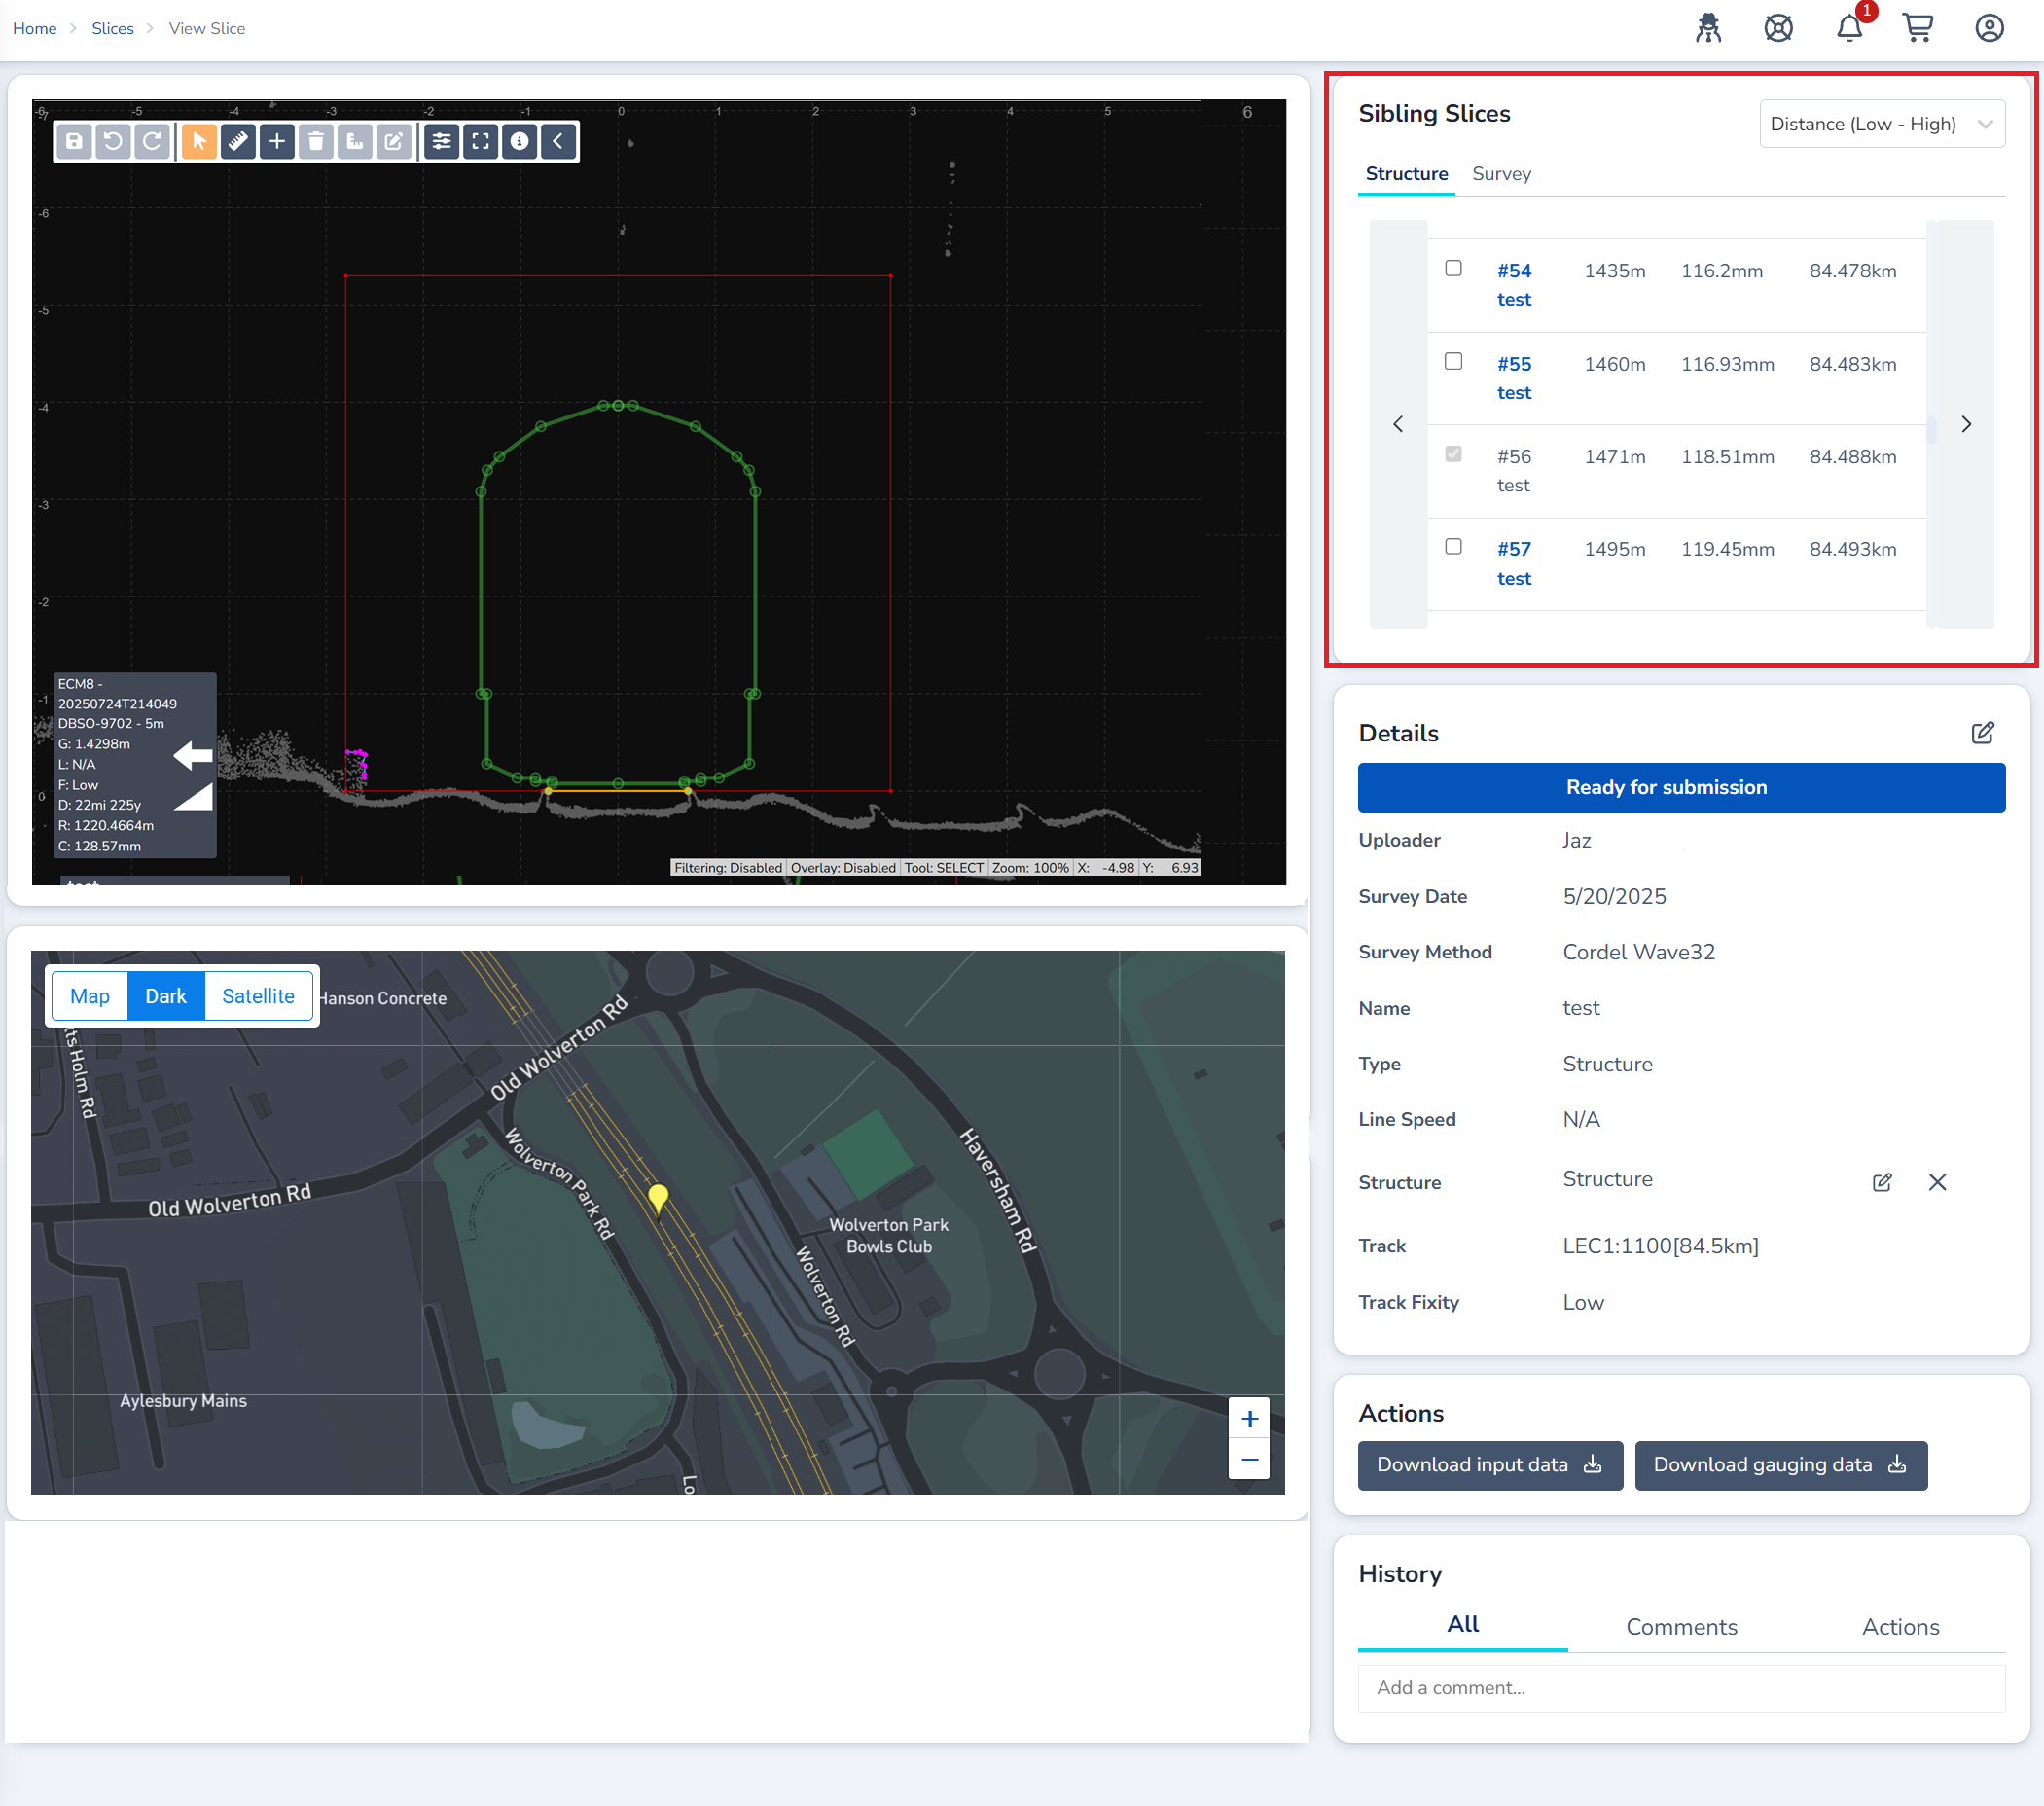
If the selected slice is assigned to a structure or survey, the sibling slices section will display slices that are part of the same structure or survey.
How to navigate between sibling slices
-
Click on the link, or
-
Click the left or right arrow buttons to the navigate to the next/previous sibling slice
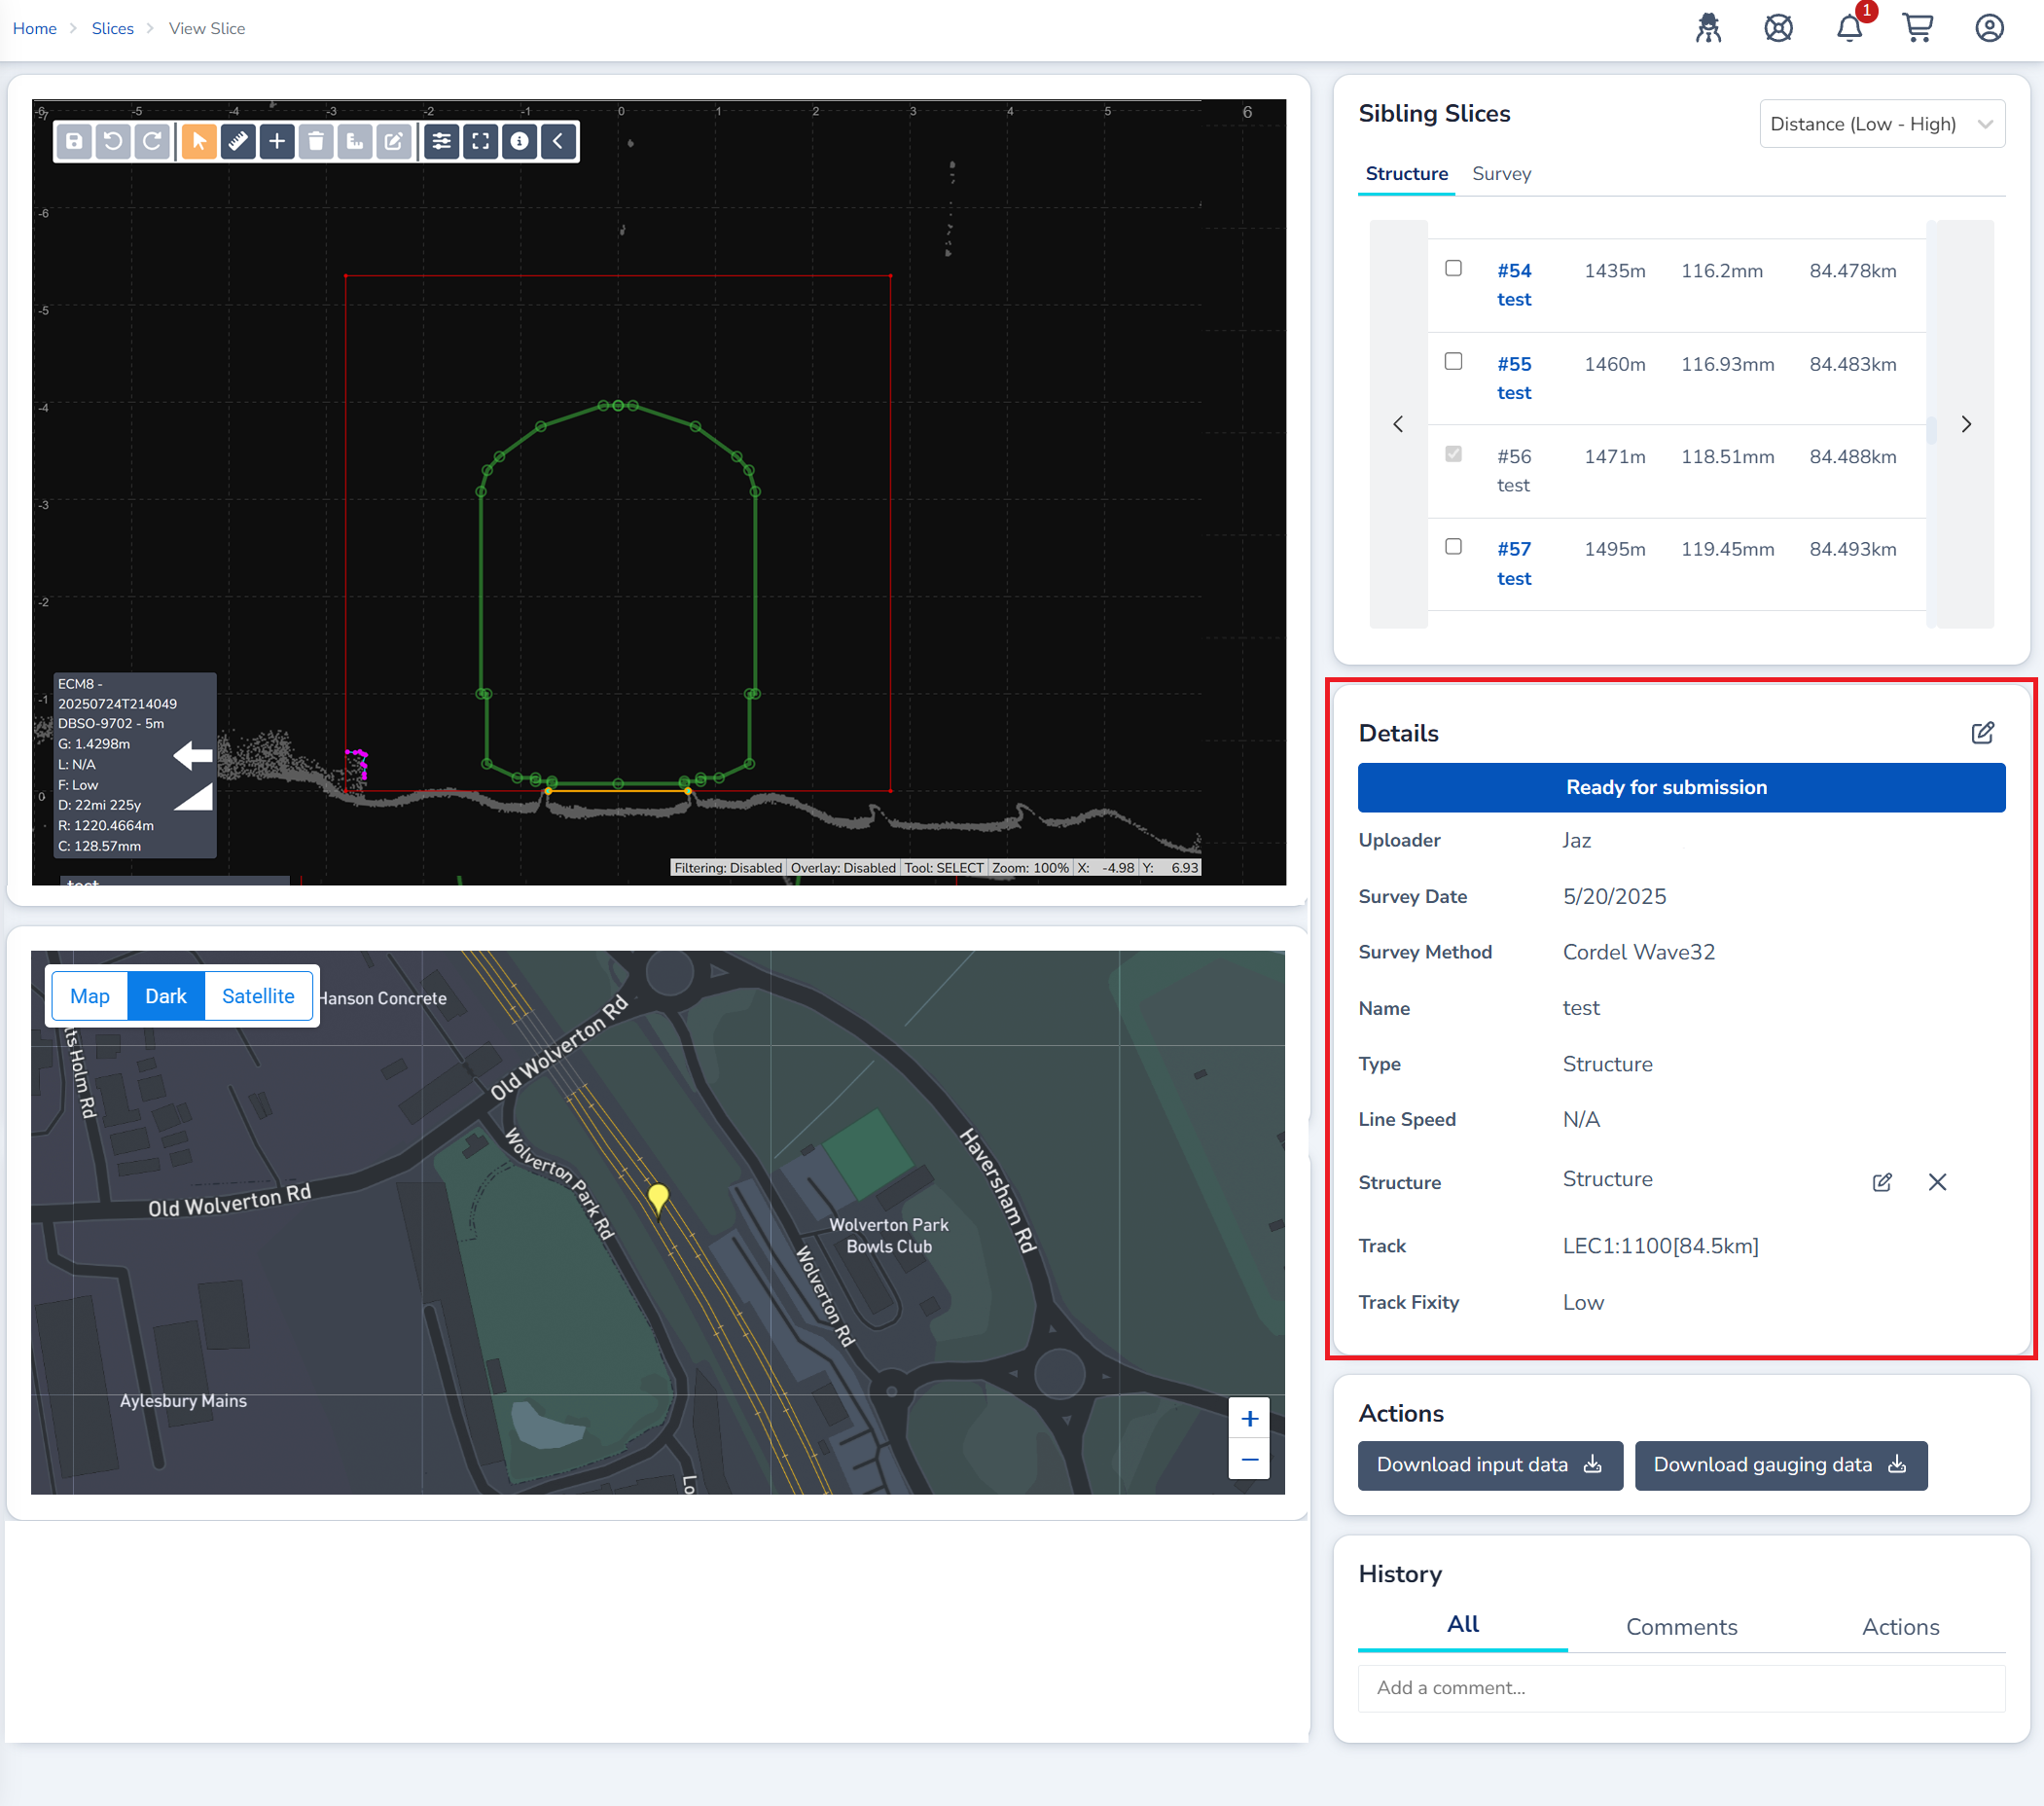
Slice Viewer Details
The Details card displays important meta data about the selected slice, including the survey date, survey method, structure name, etc
How to change a slices details
-
If you have permission to change the meta data details, you will see the edit icon in the top right hand side of the Details section.
-
Click the edit button.
-
Make the required changes to the slice details
-
Click save
Slice Viewer Actions
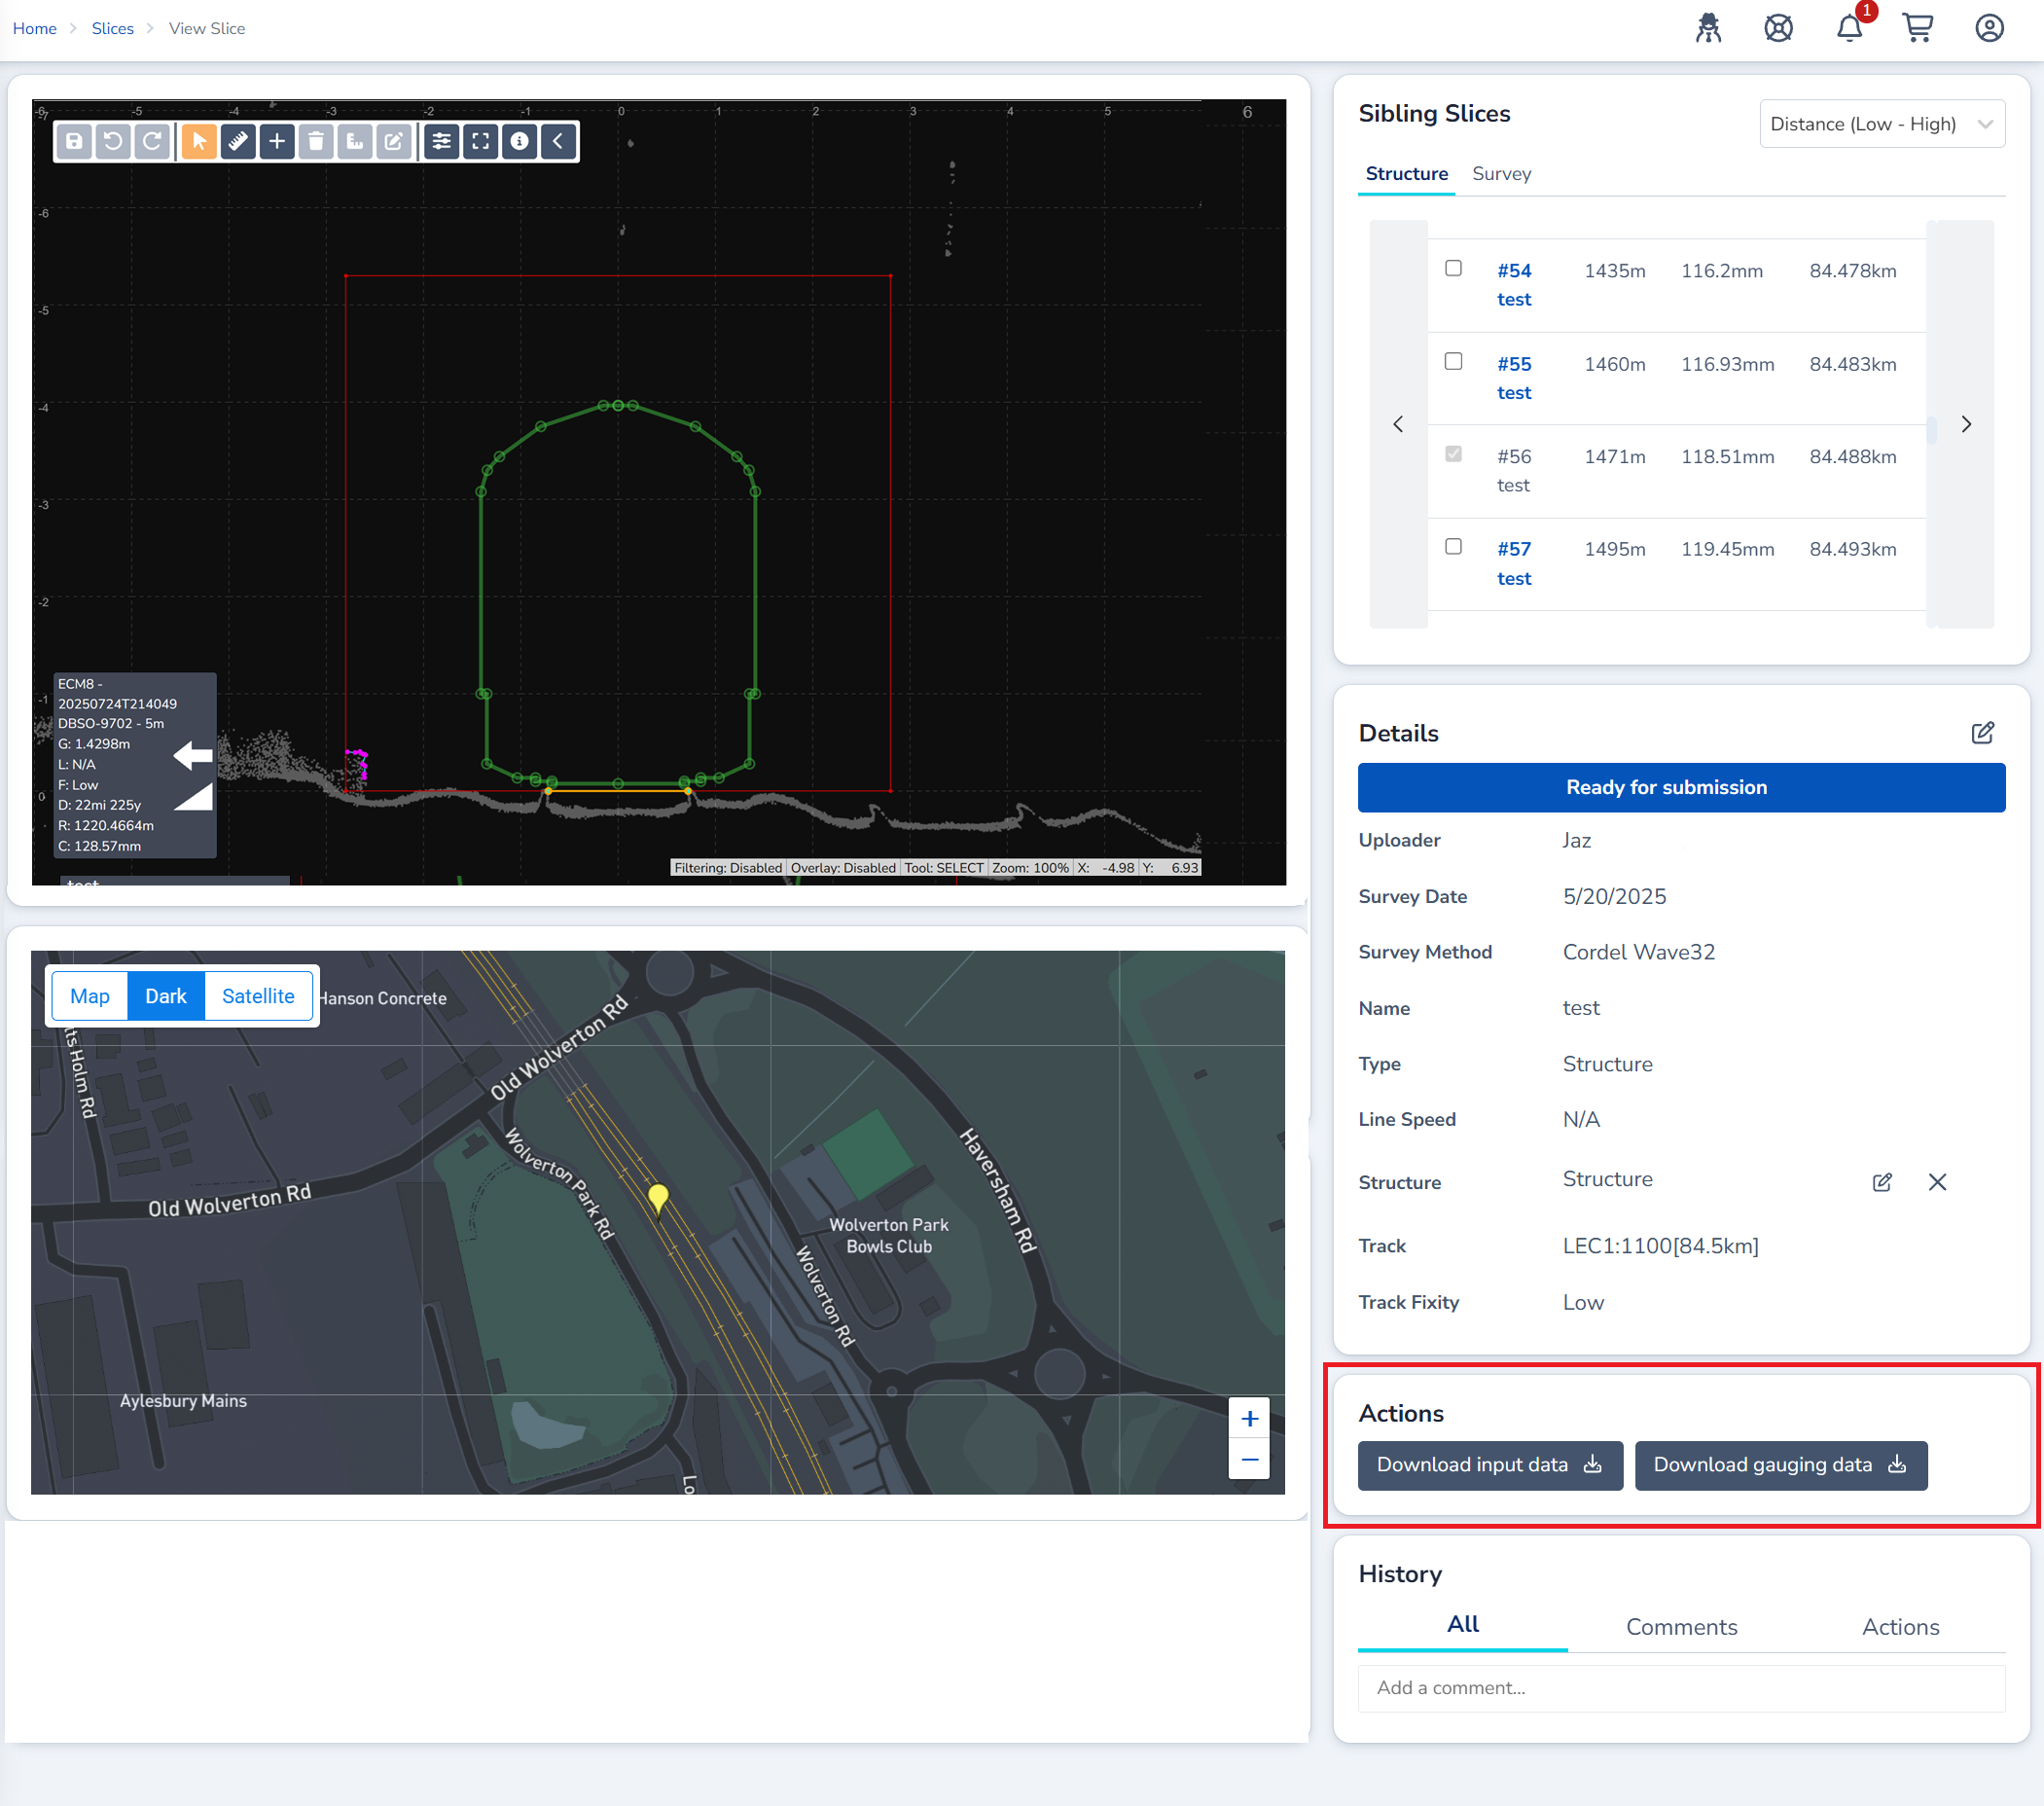
Users are able to engage further with slices through the Actions available in this section. The actions shown will depend on your configuration of Cordel Connect, but typically include things like:
Download Input Data
This allows users to download the original data user to create the selected slice. When input data is downloaded, the file type matches the original file type that was uploaded.
Download Gauging Data
This allows users to download the slices selected in the 'Sibling Slices' window. When slices are downloaded, they are exported as .SC* files.
Slice Viewer History
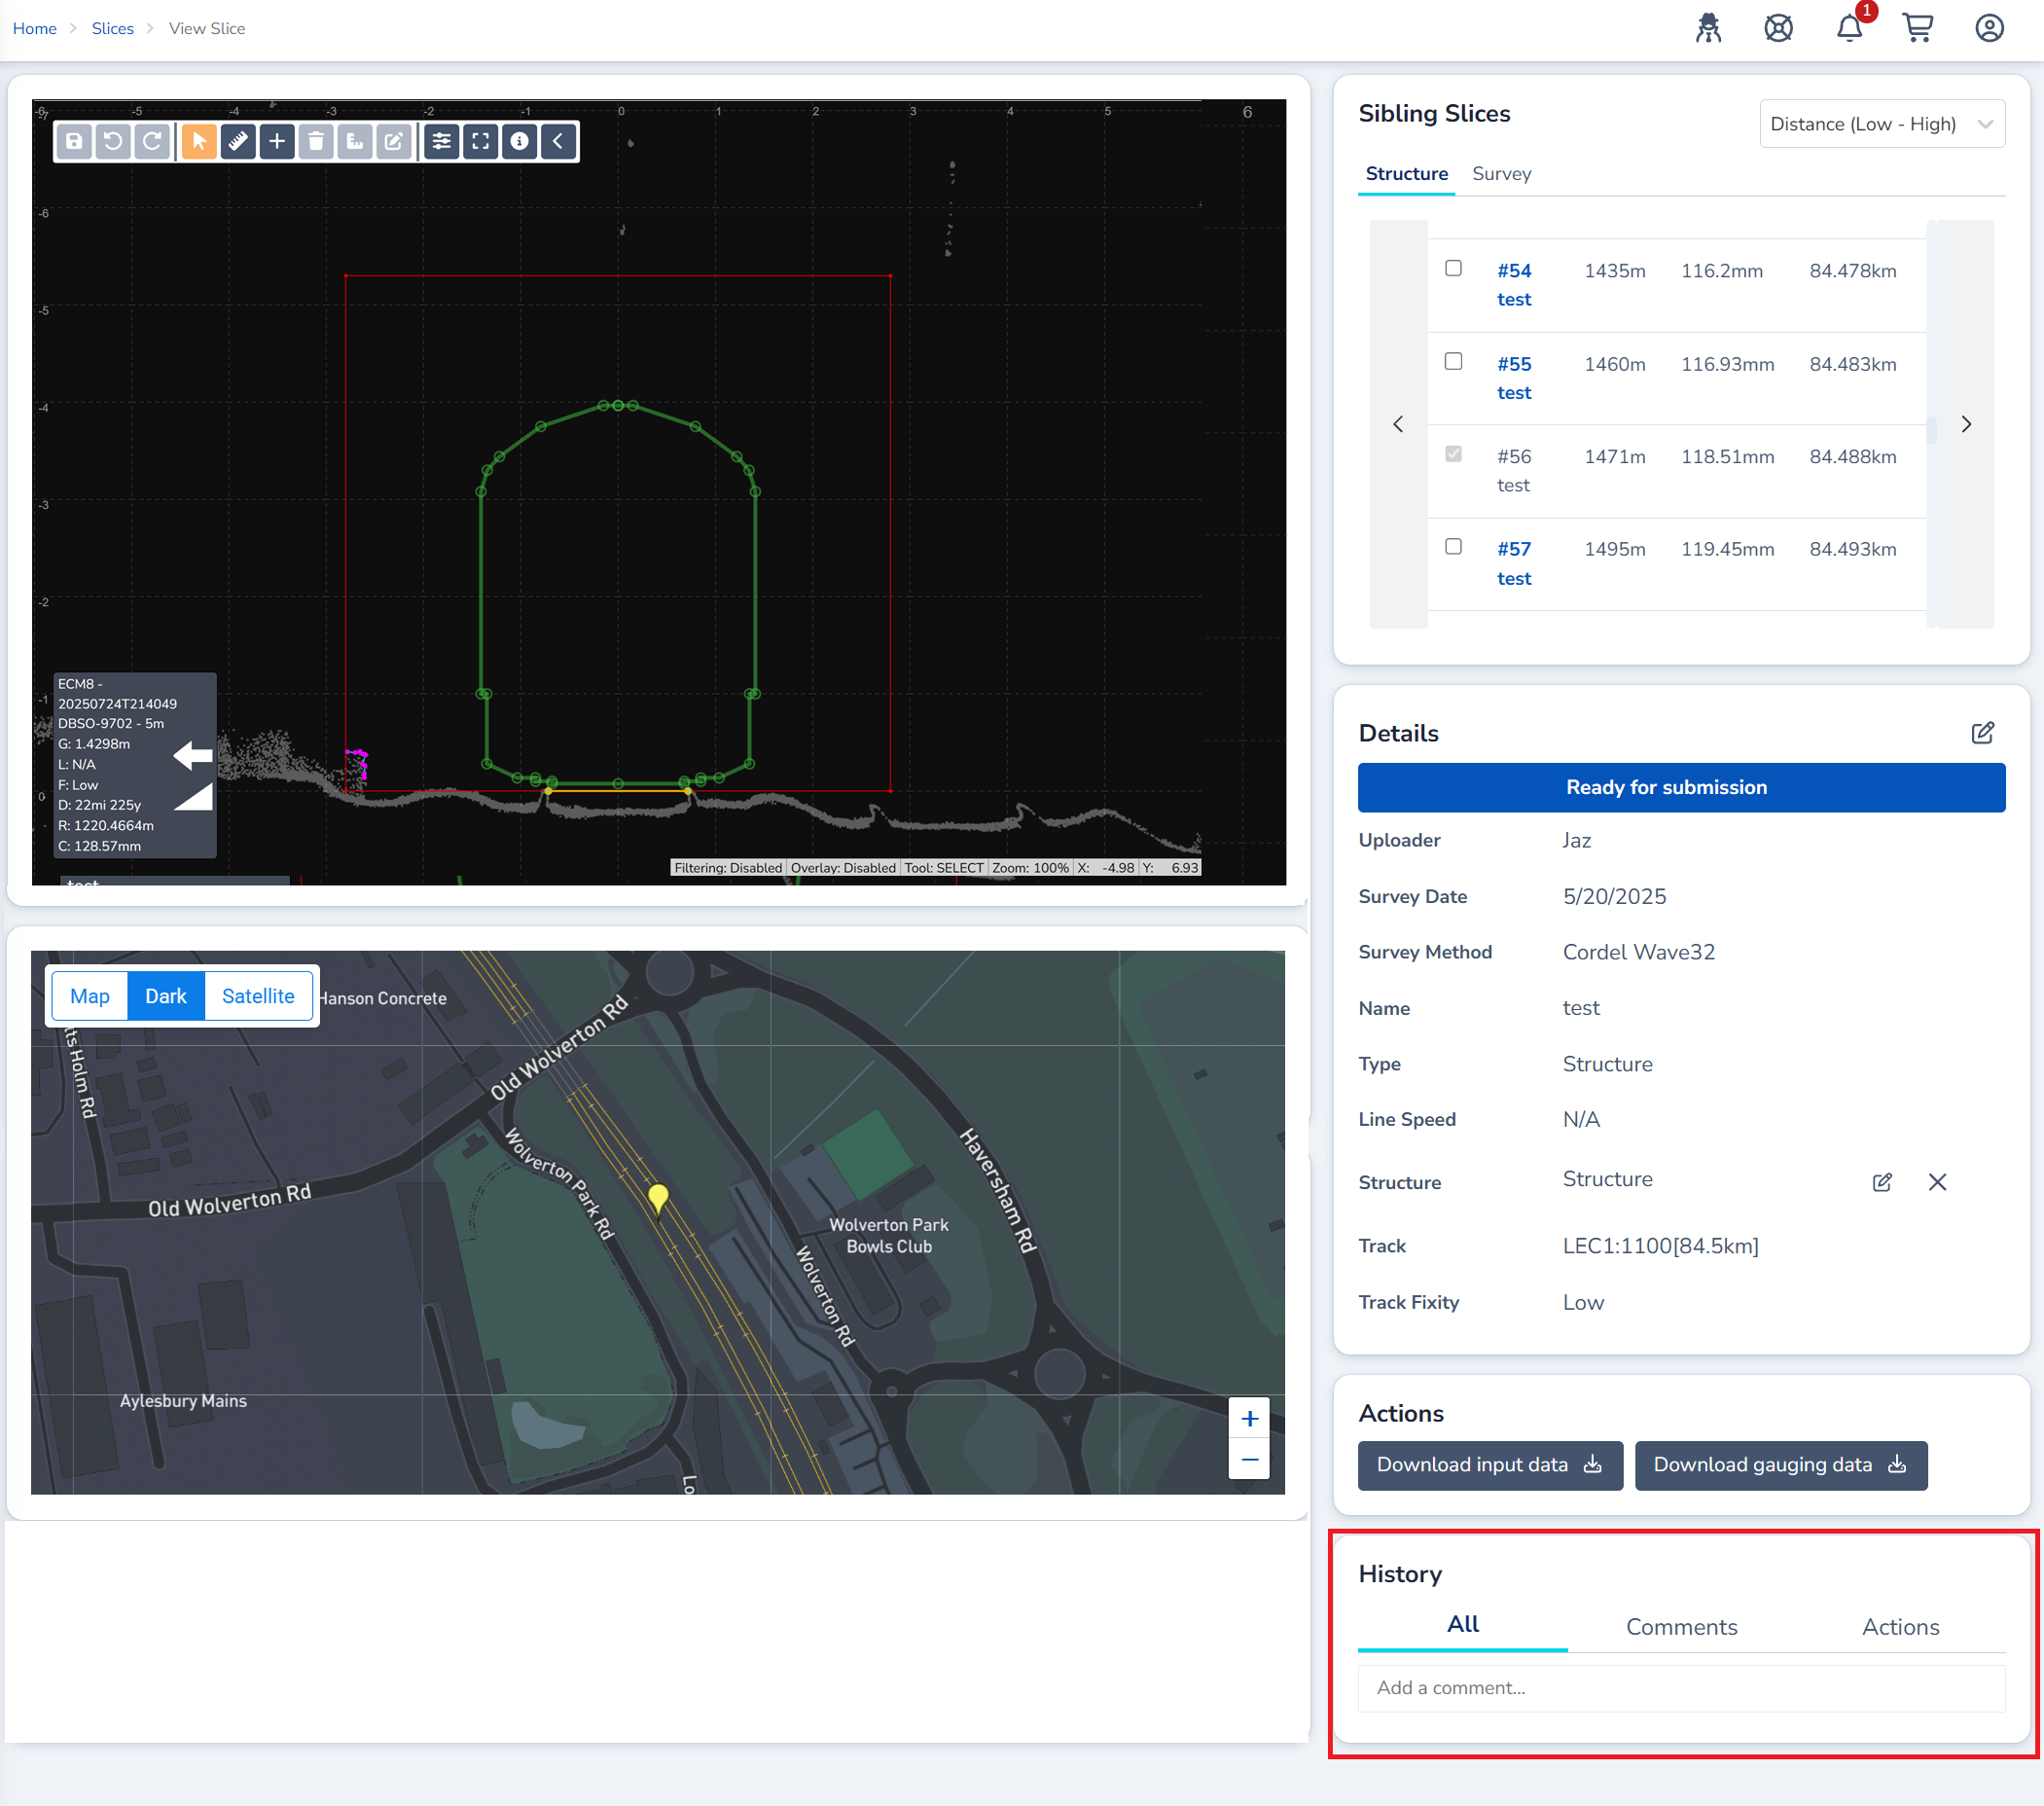
The History card provides users with an audit log for the selected slice.
Comments are created by users of Cordel Connect and are represented by the 
System notes are generated by the system and are represented by the 
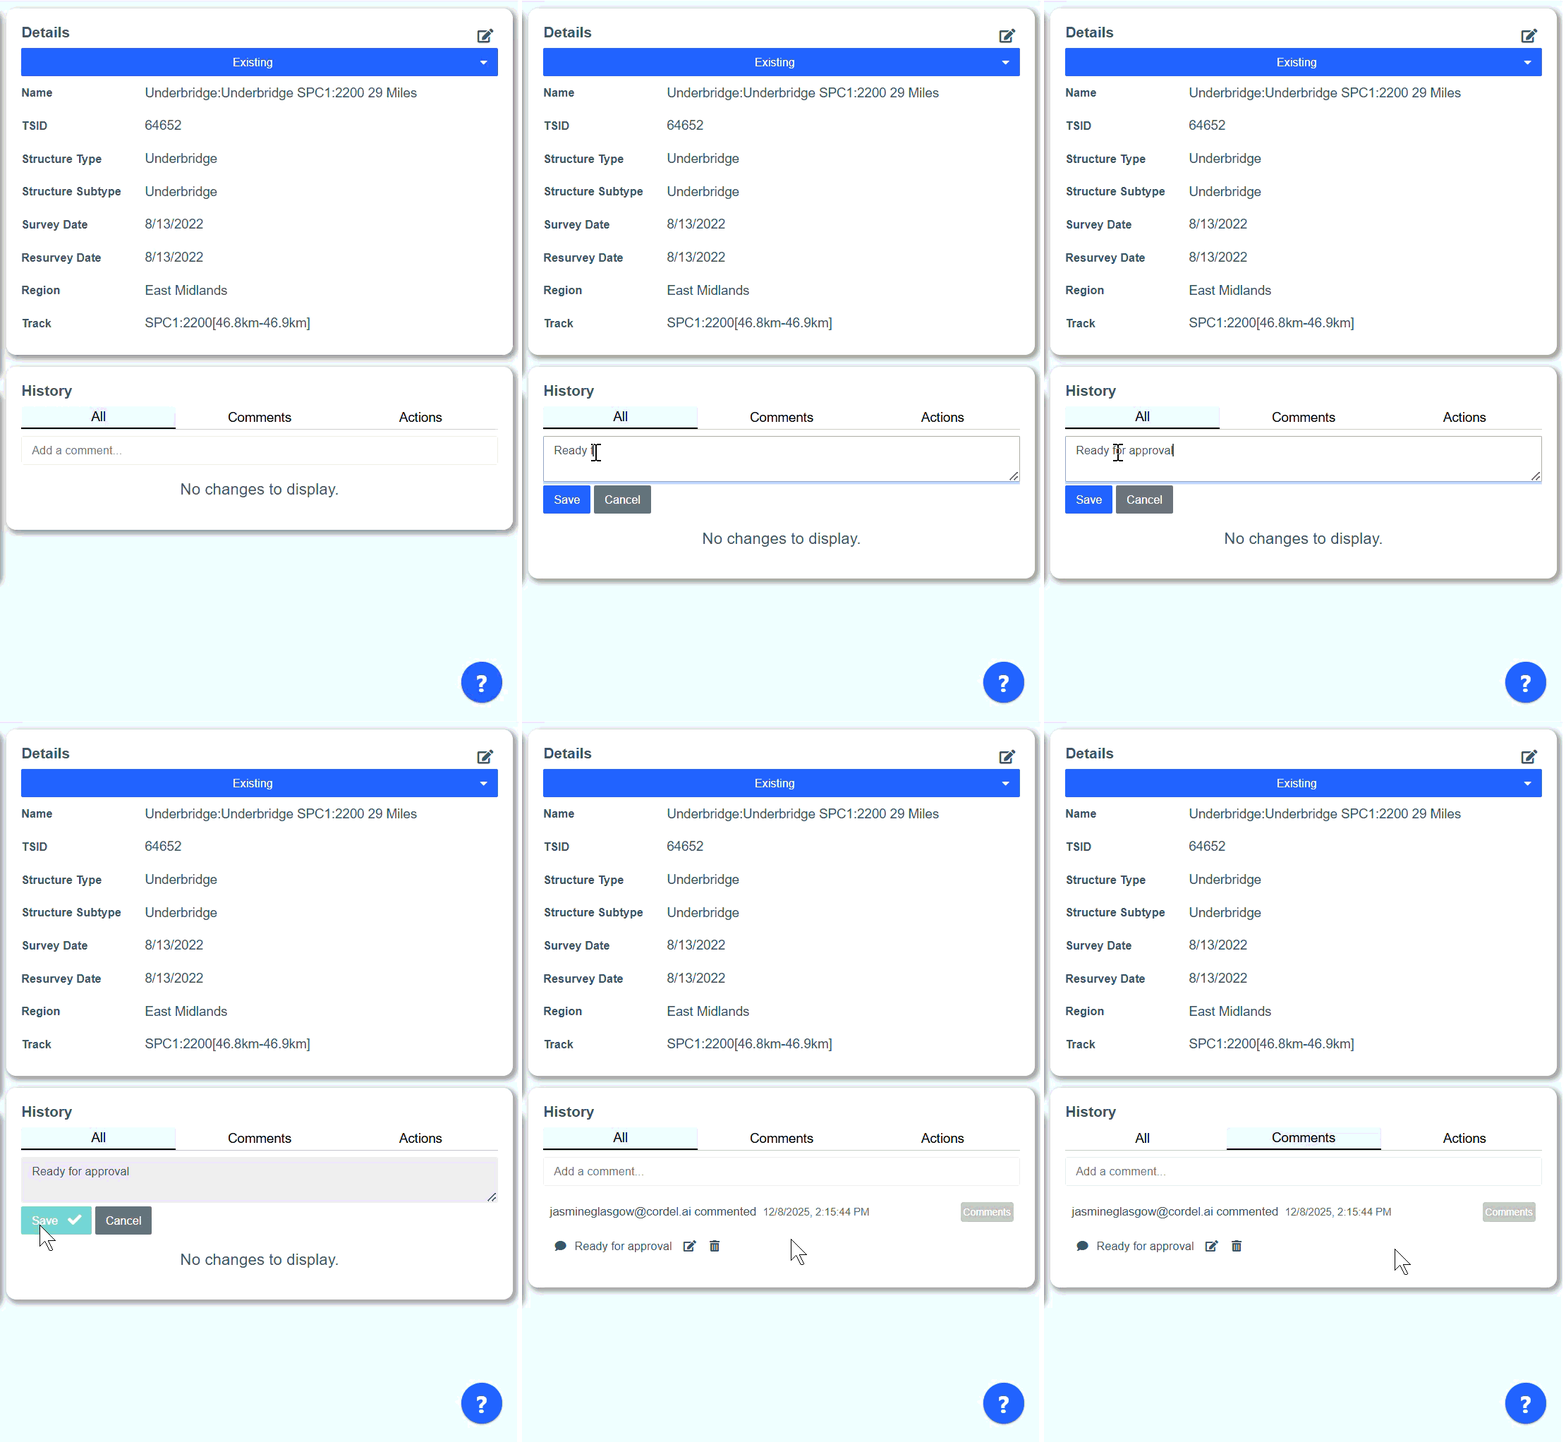
How to create, edit and remove comments
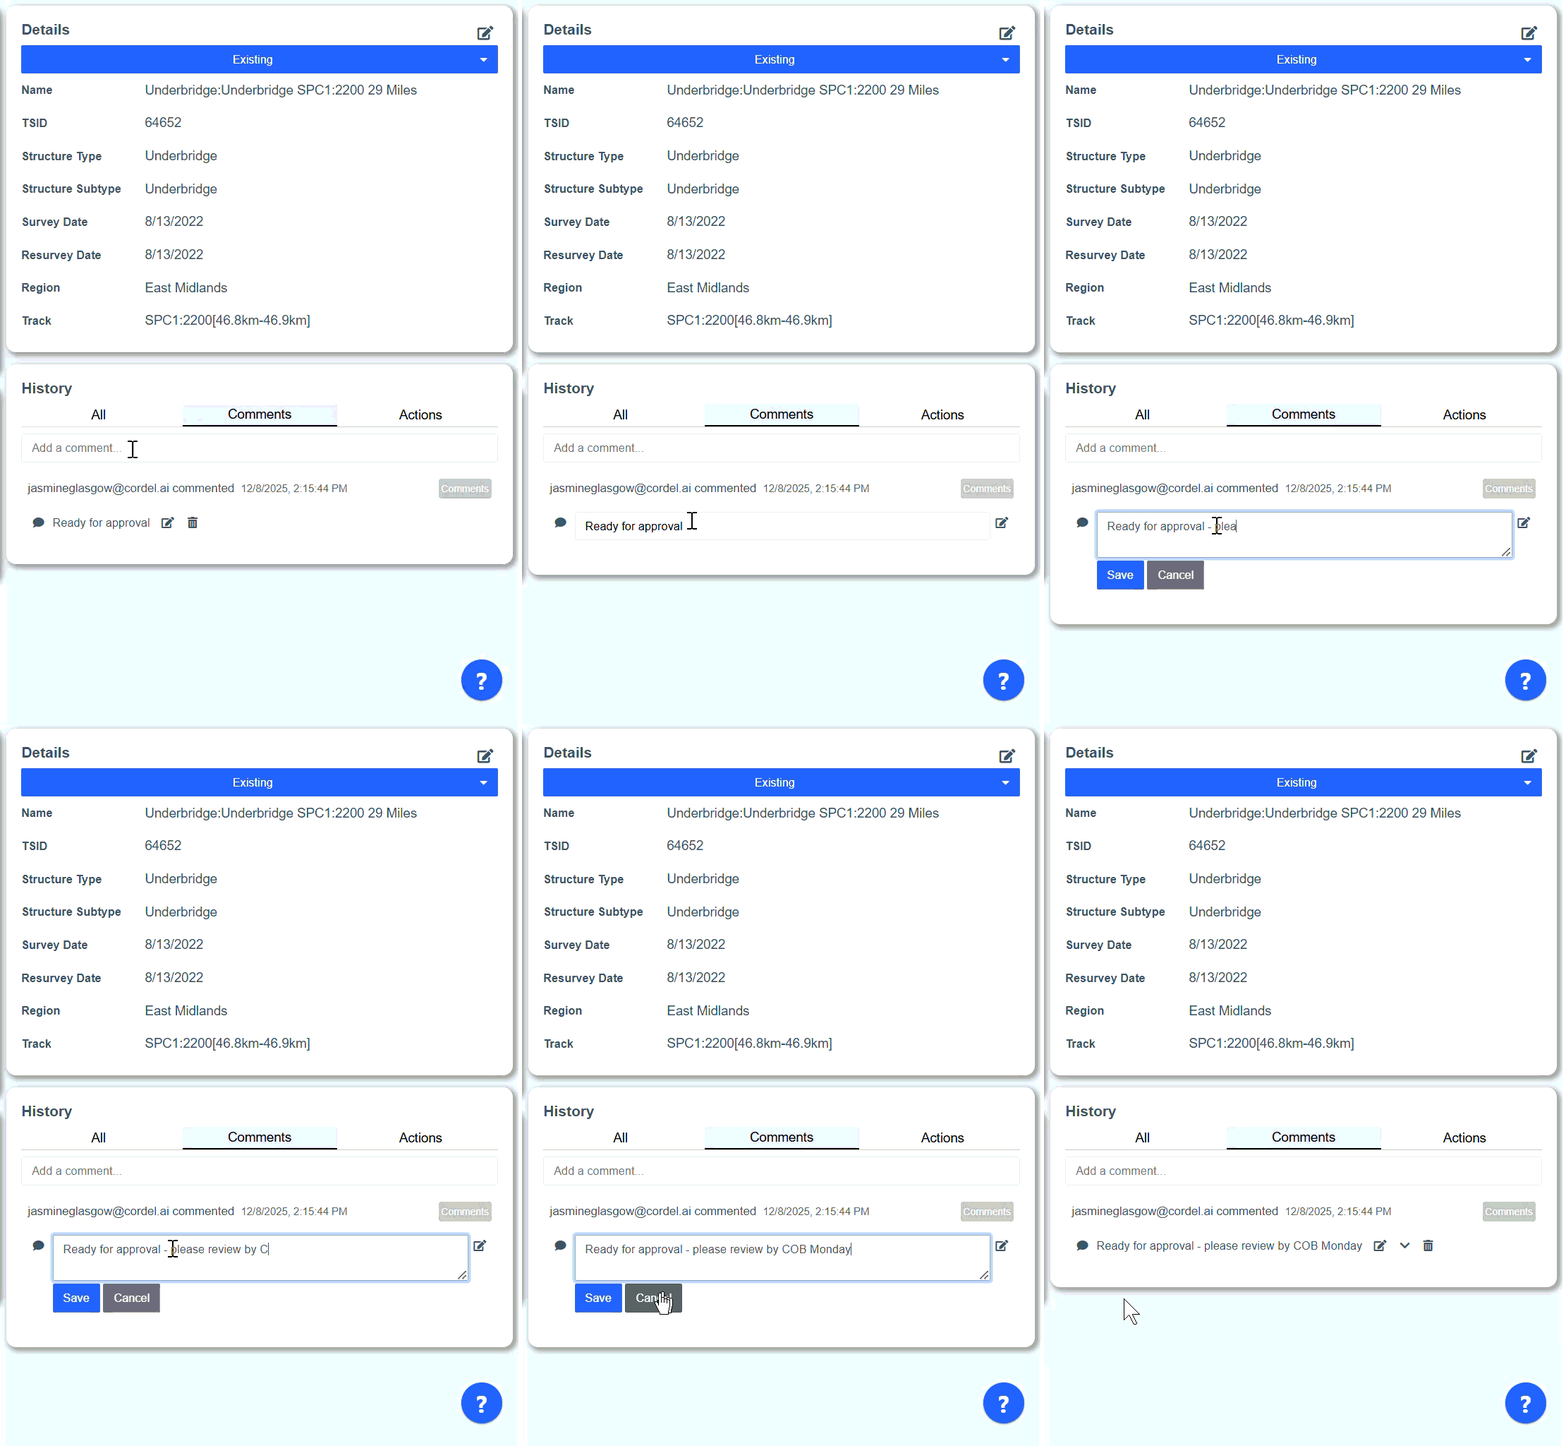
How to add a comment to the history of a slice
|
How to edit a comment in slice history
Your previous comment will still be visible to users. |
|
|
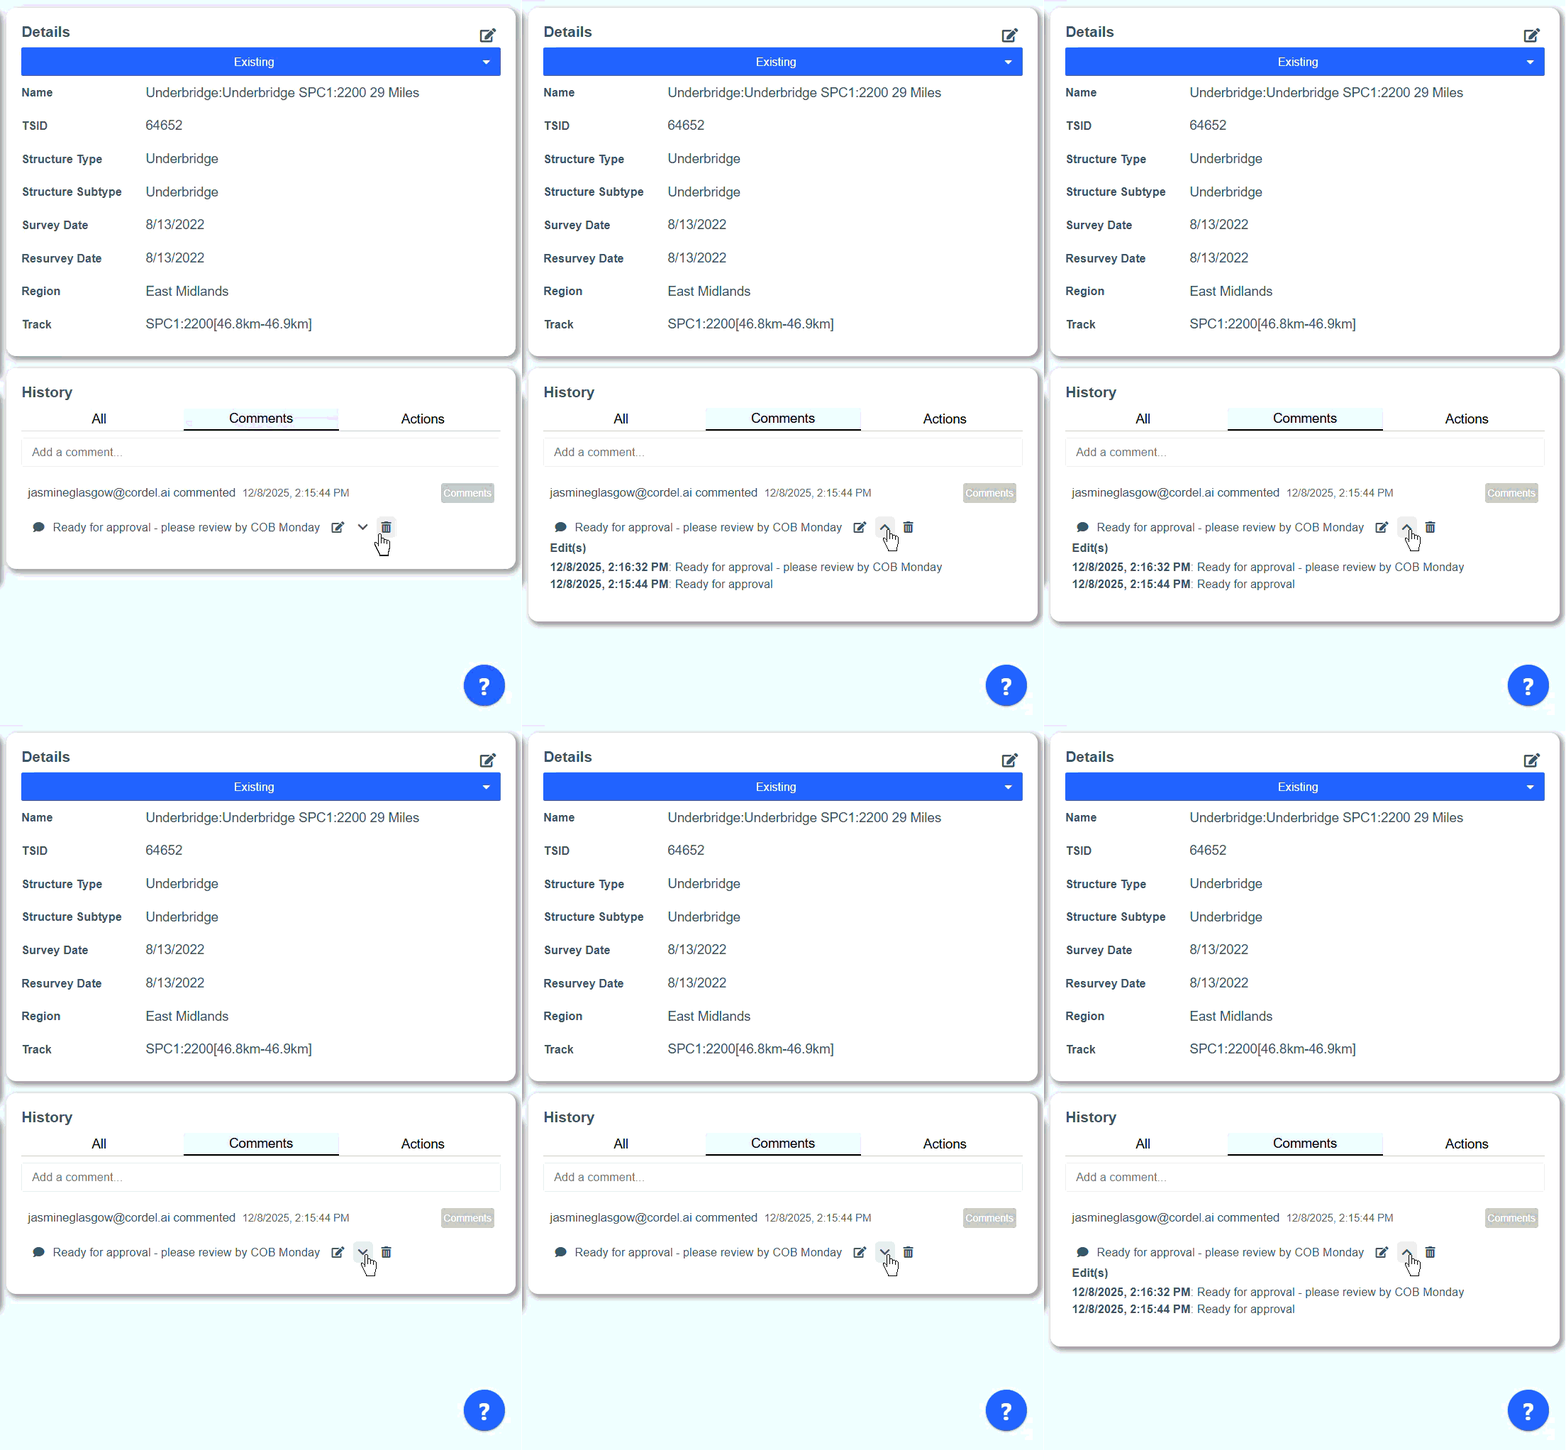
How to view previous versions of a comment in slice history
|
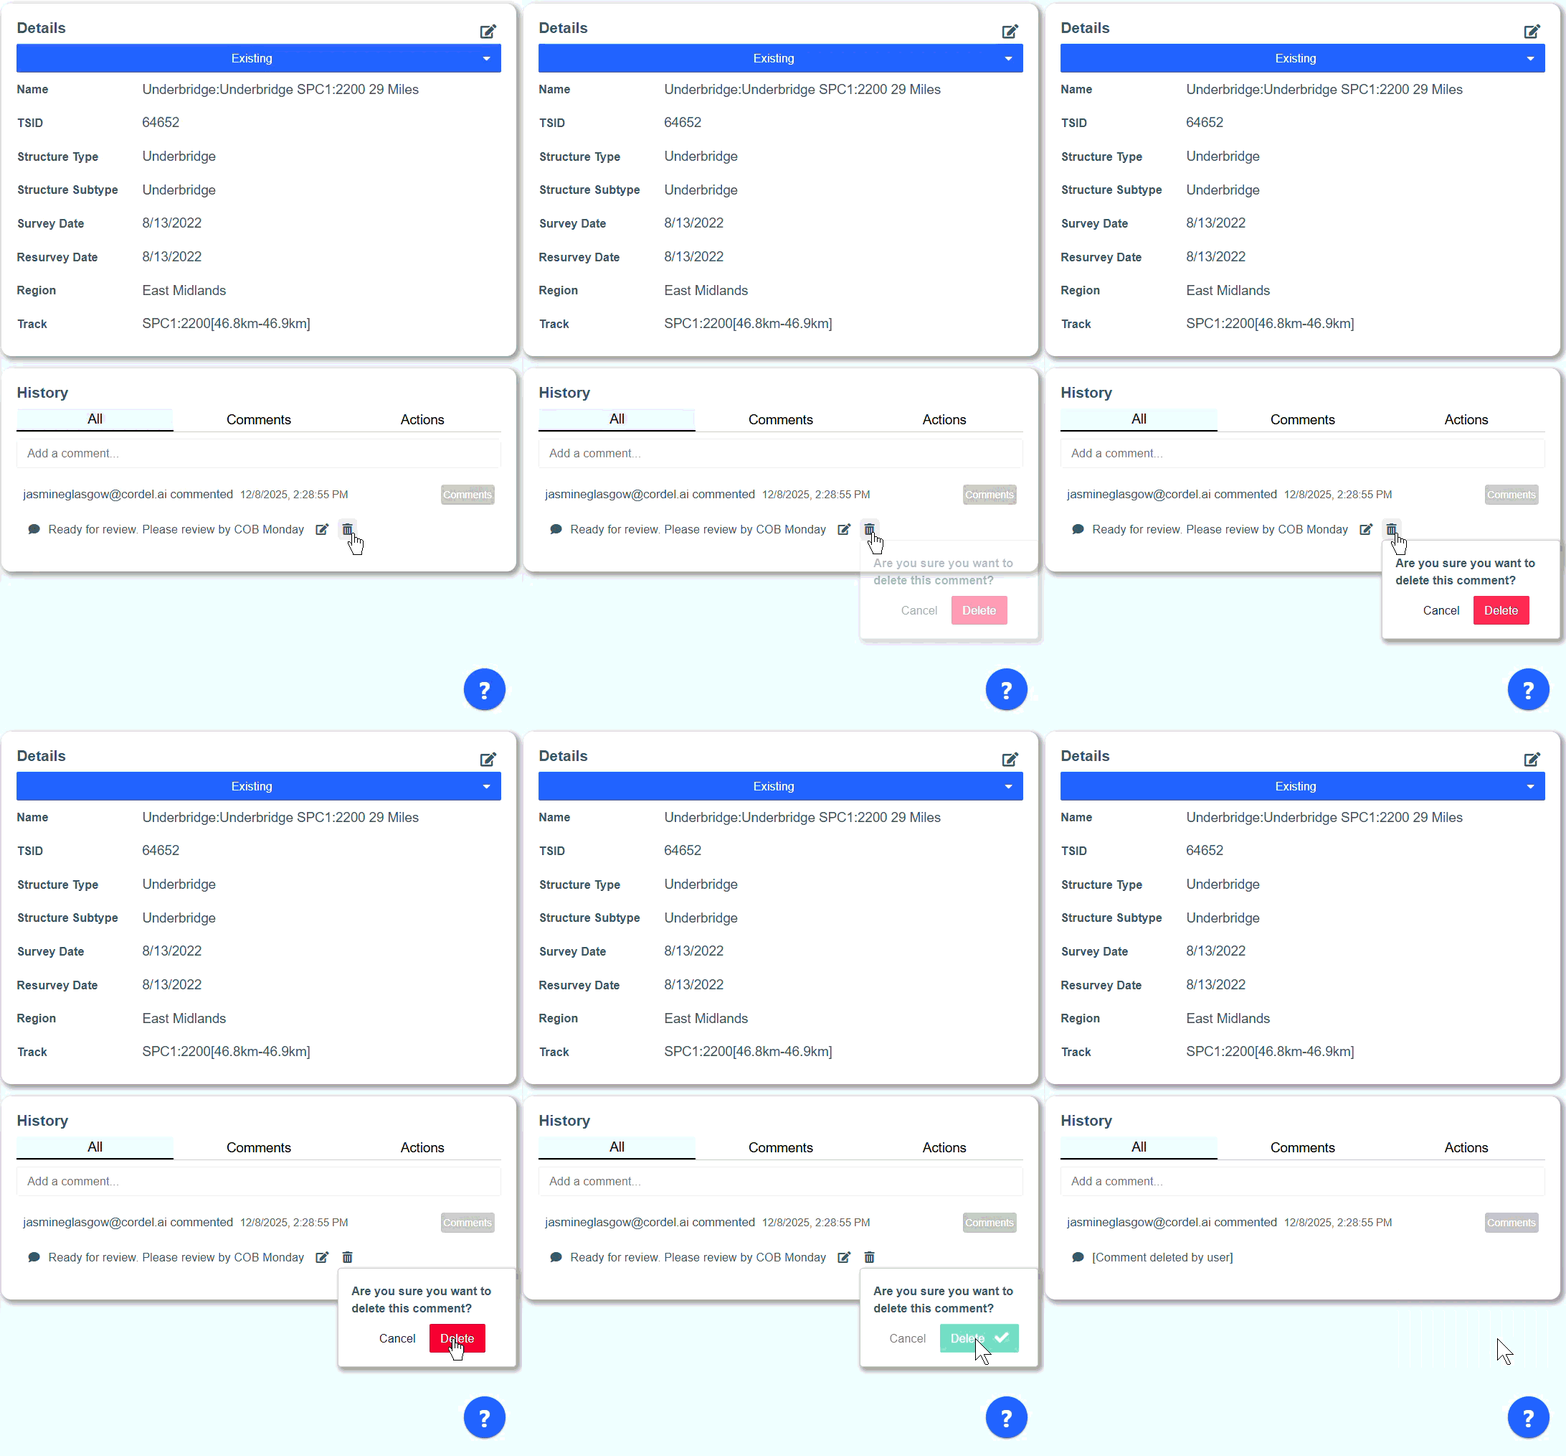
How to delete a comment in slice history
The ability to delete comments is controlled by permissions. Cordel Connect will display [Comment deleted by user] where a comment has been deleted. |
|
|